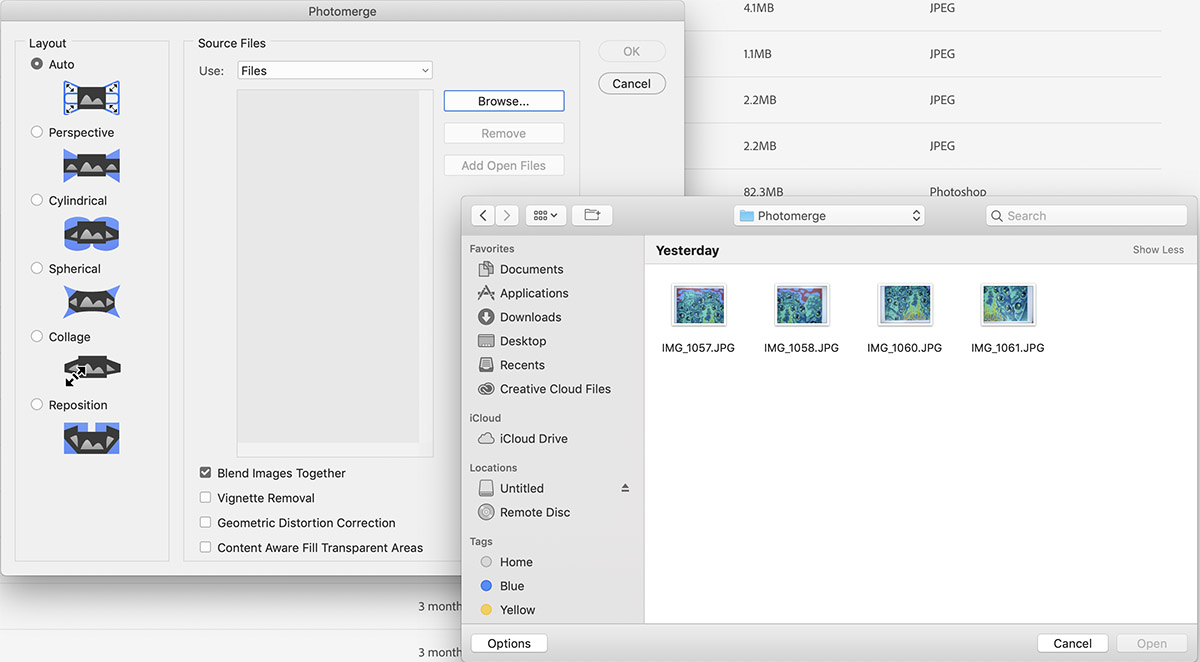
Photomerge is great for illustrators or artists that work at a large scale and can’t use a traditional flat-bed scanner to document their work. Photomerge lets you select multiple photos and automatically batches them together into a single, large file.
4 different shots of the same painting split up in my finder window.
Find the Photomerge Menu
Select the Photomerge section in File>Automate>Photomerge
Find the Photomerge tool at File>Automate>Photomerge
Select the number of photos you want to merge together.
Select your photos to merge.
You’ll end up with a Photomerge that might look kind of out of shape at first.
What a mess.
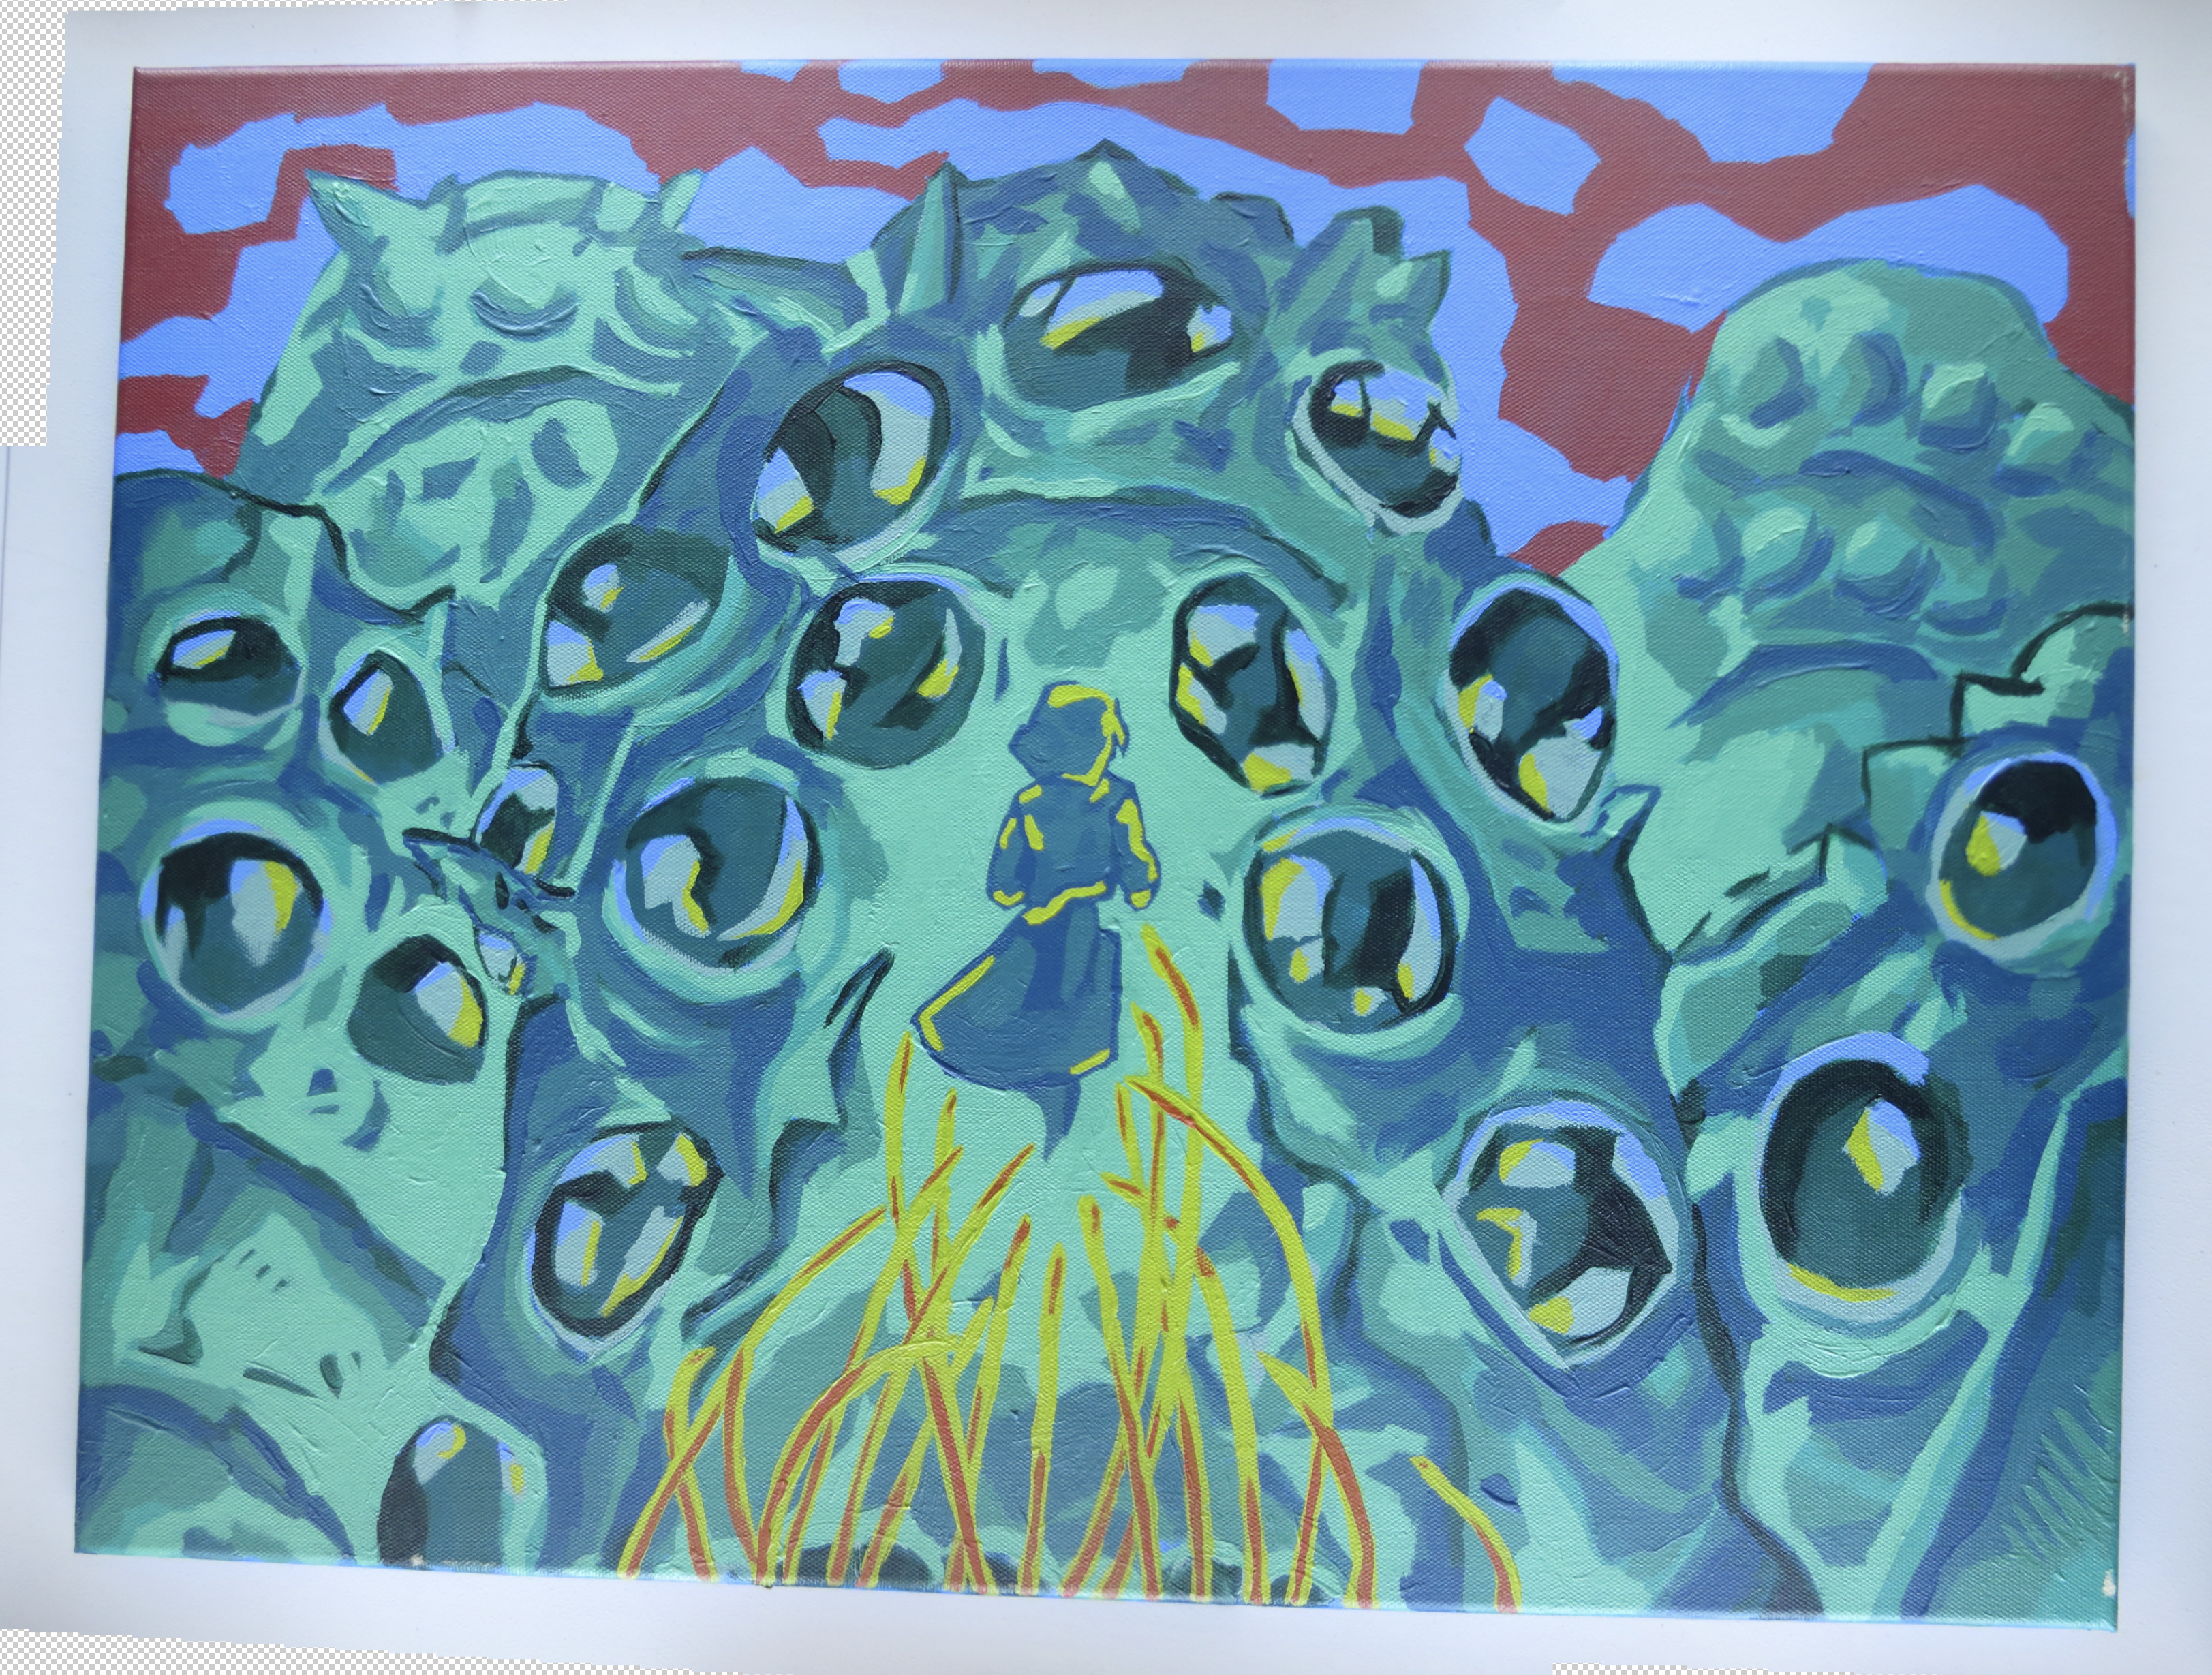
A few tweaks in Photoshop and you have a perfect file ready for professional prints! No scanner necessary!
A print ready file after tweaking with Photoshop!
Photomerge is a simple tool you can use to transfer large artworks into a printer-friendly format.
If you’re curious about this subject manner, its a stylized clip from Nausicaa Of The Valley Of The Wind. Look forward to more tutorial and art lessons in future posts.
*Please don’t use this photography hack to steal other artist’s unsold work; even for personal use. Please verify that any public works you photograph this way are verified to be copyrighted in the public domain!
Refilling a fountain pen is easier than you think. Follow these steps to carefully refill your favorite fountain pen.
Disassemble and clean your pen according to manufacturer instructions.
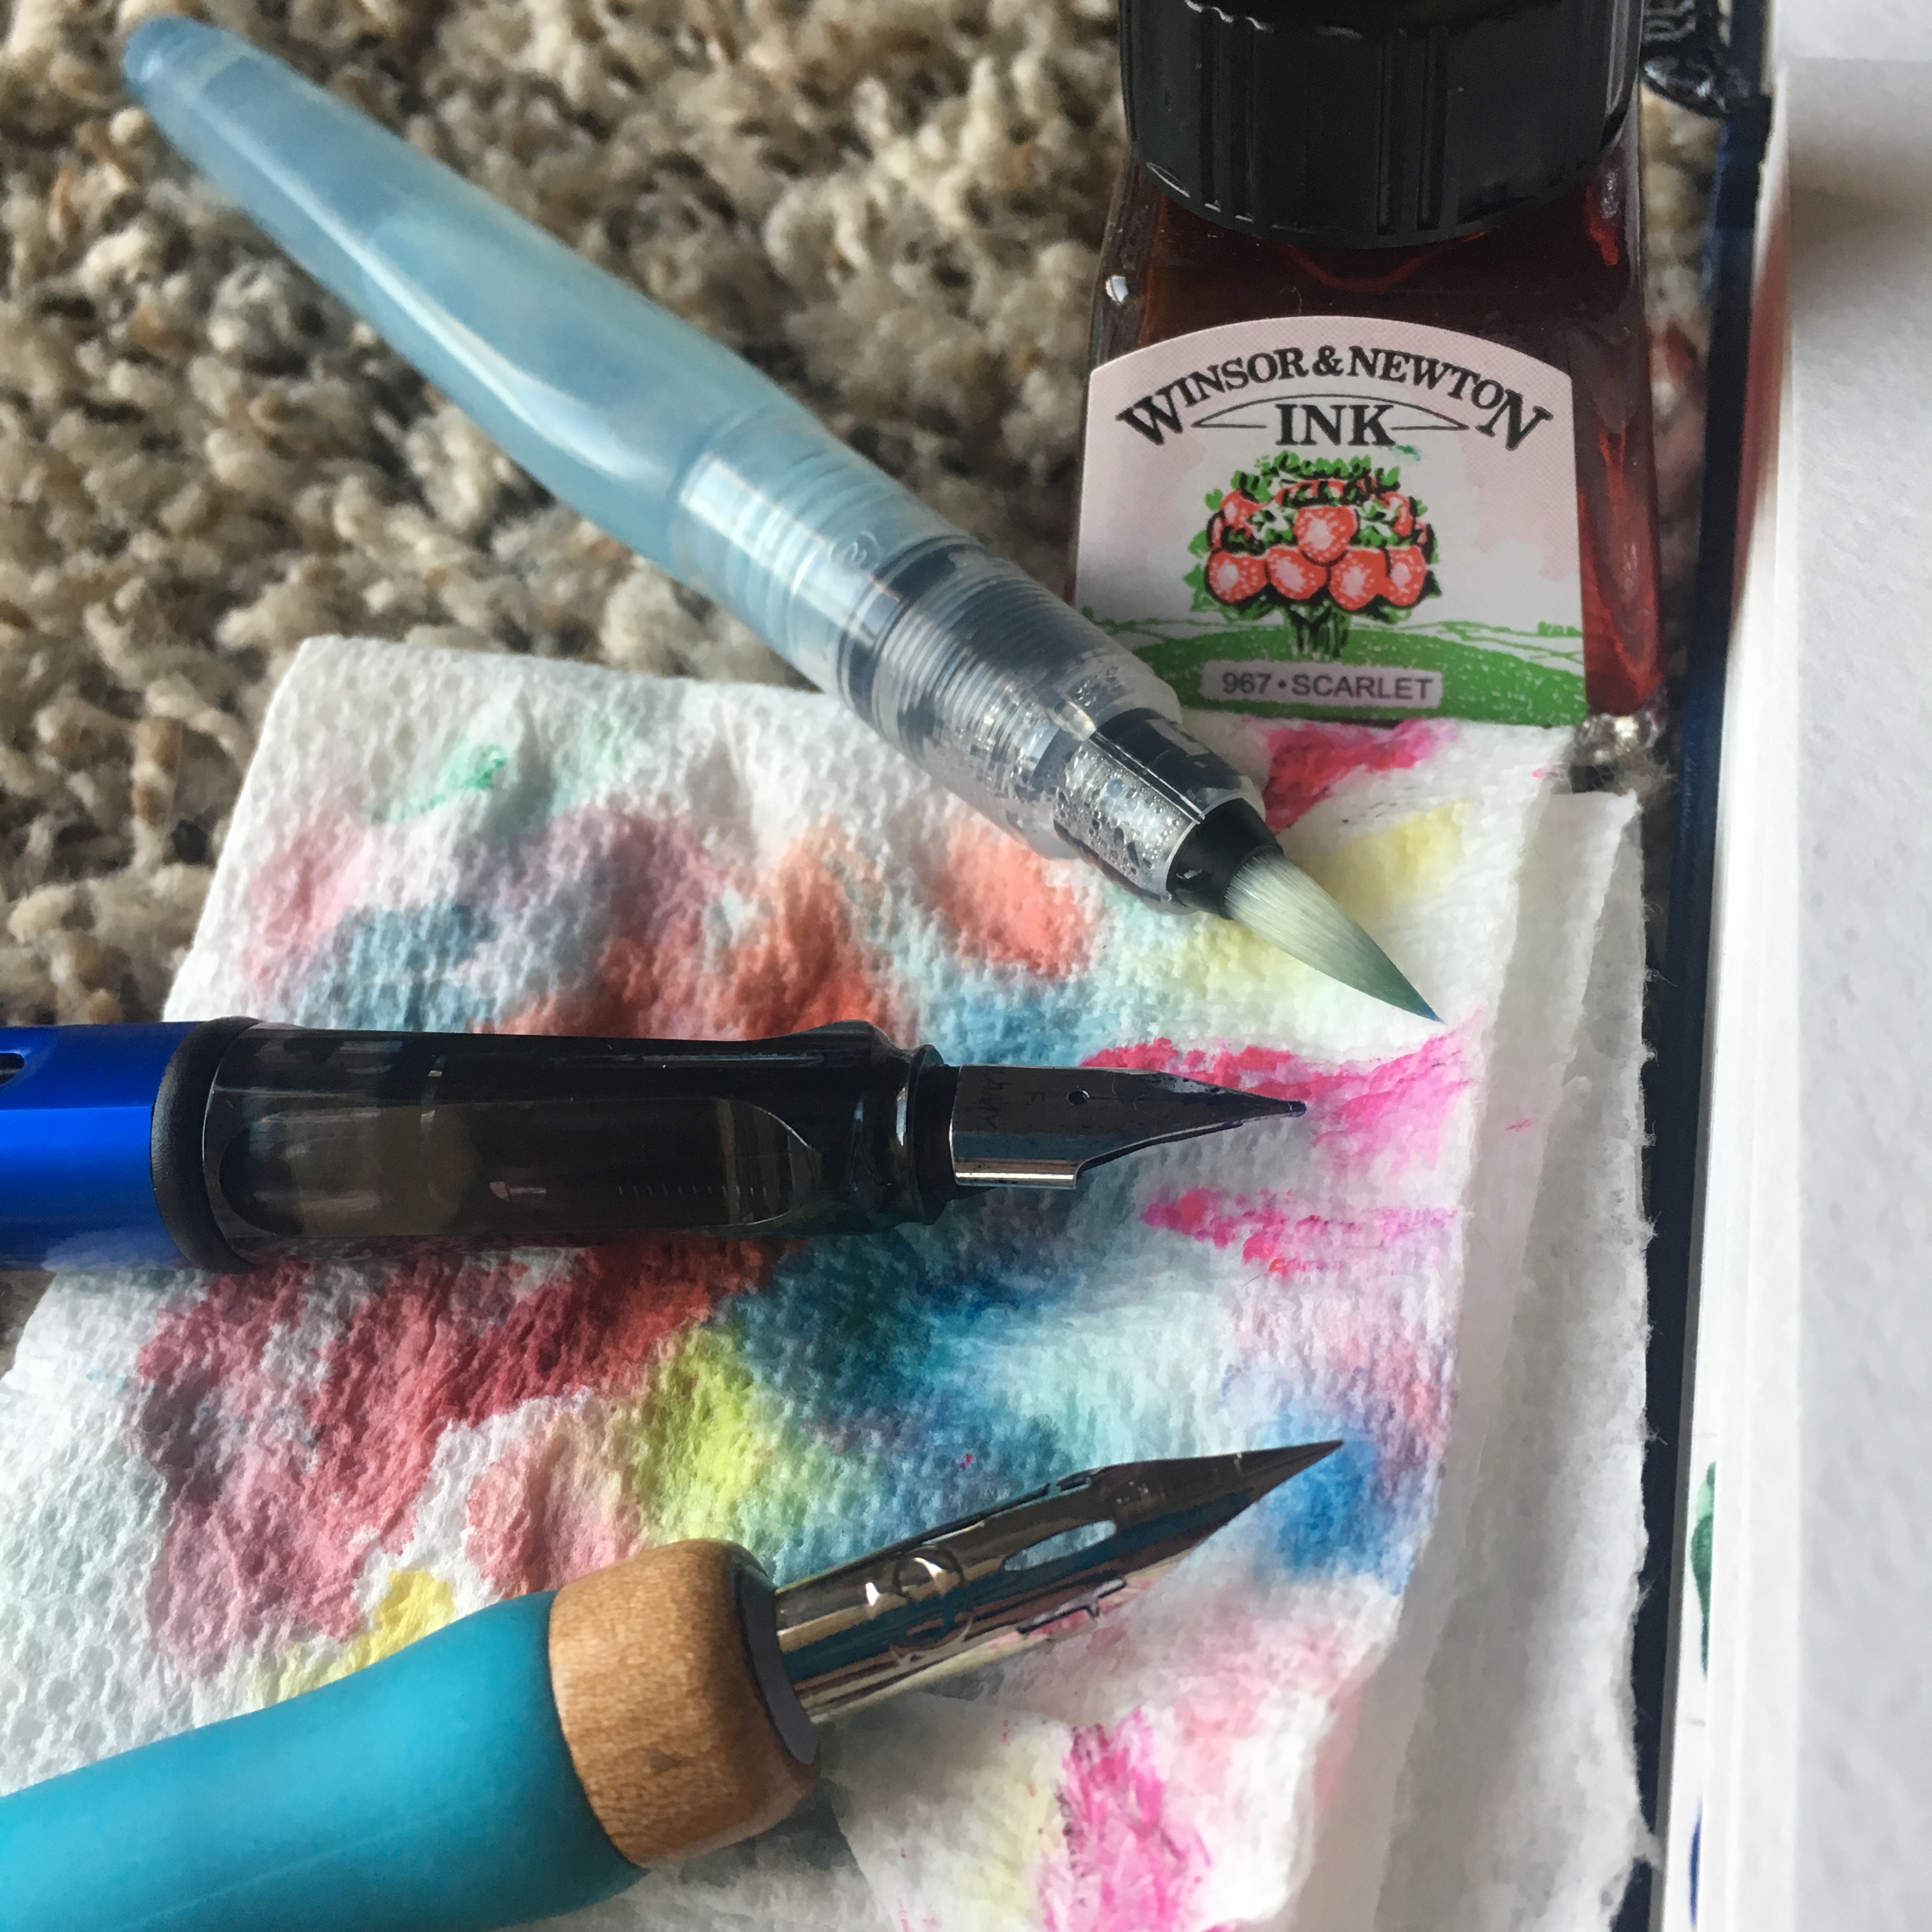
Select the ink for your fountain pen’s refill.
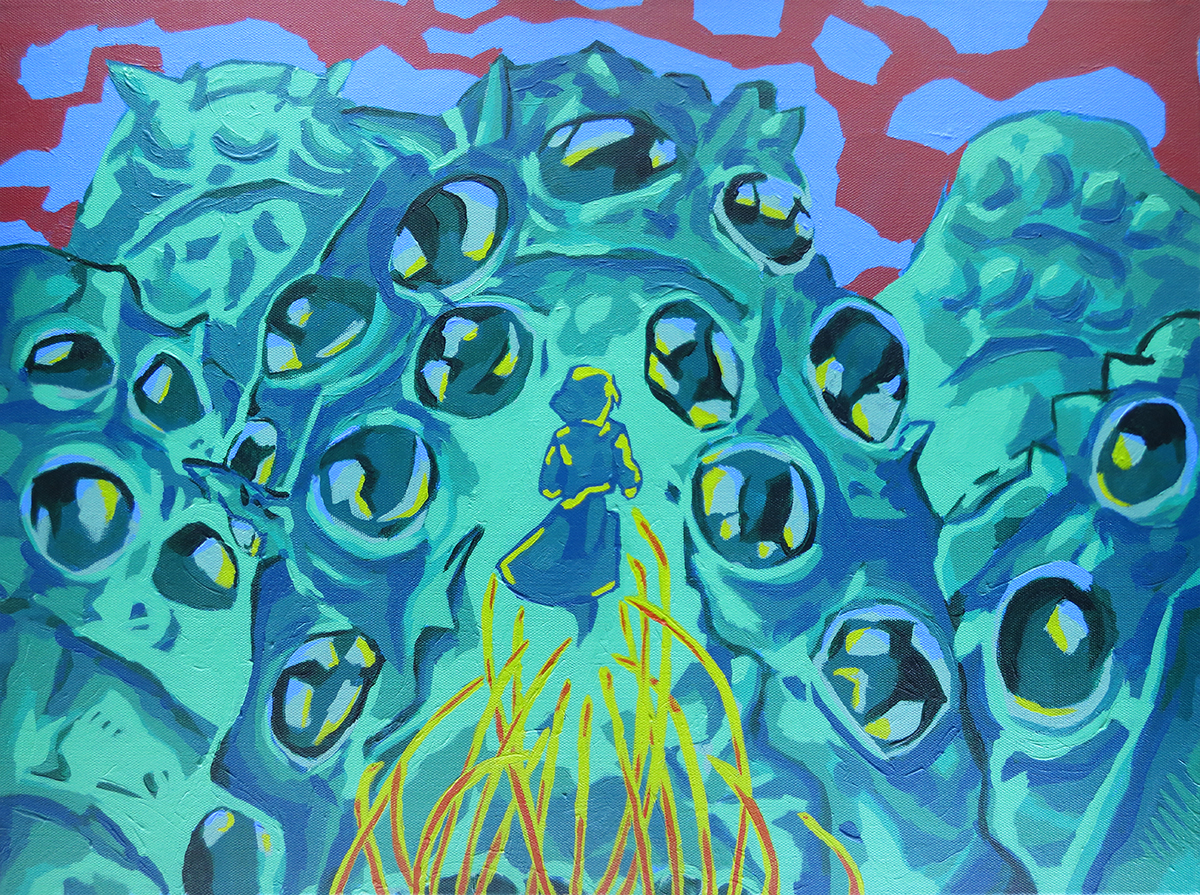
Protect your table’s surface with a towel or newspaper.
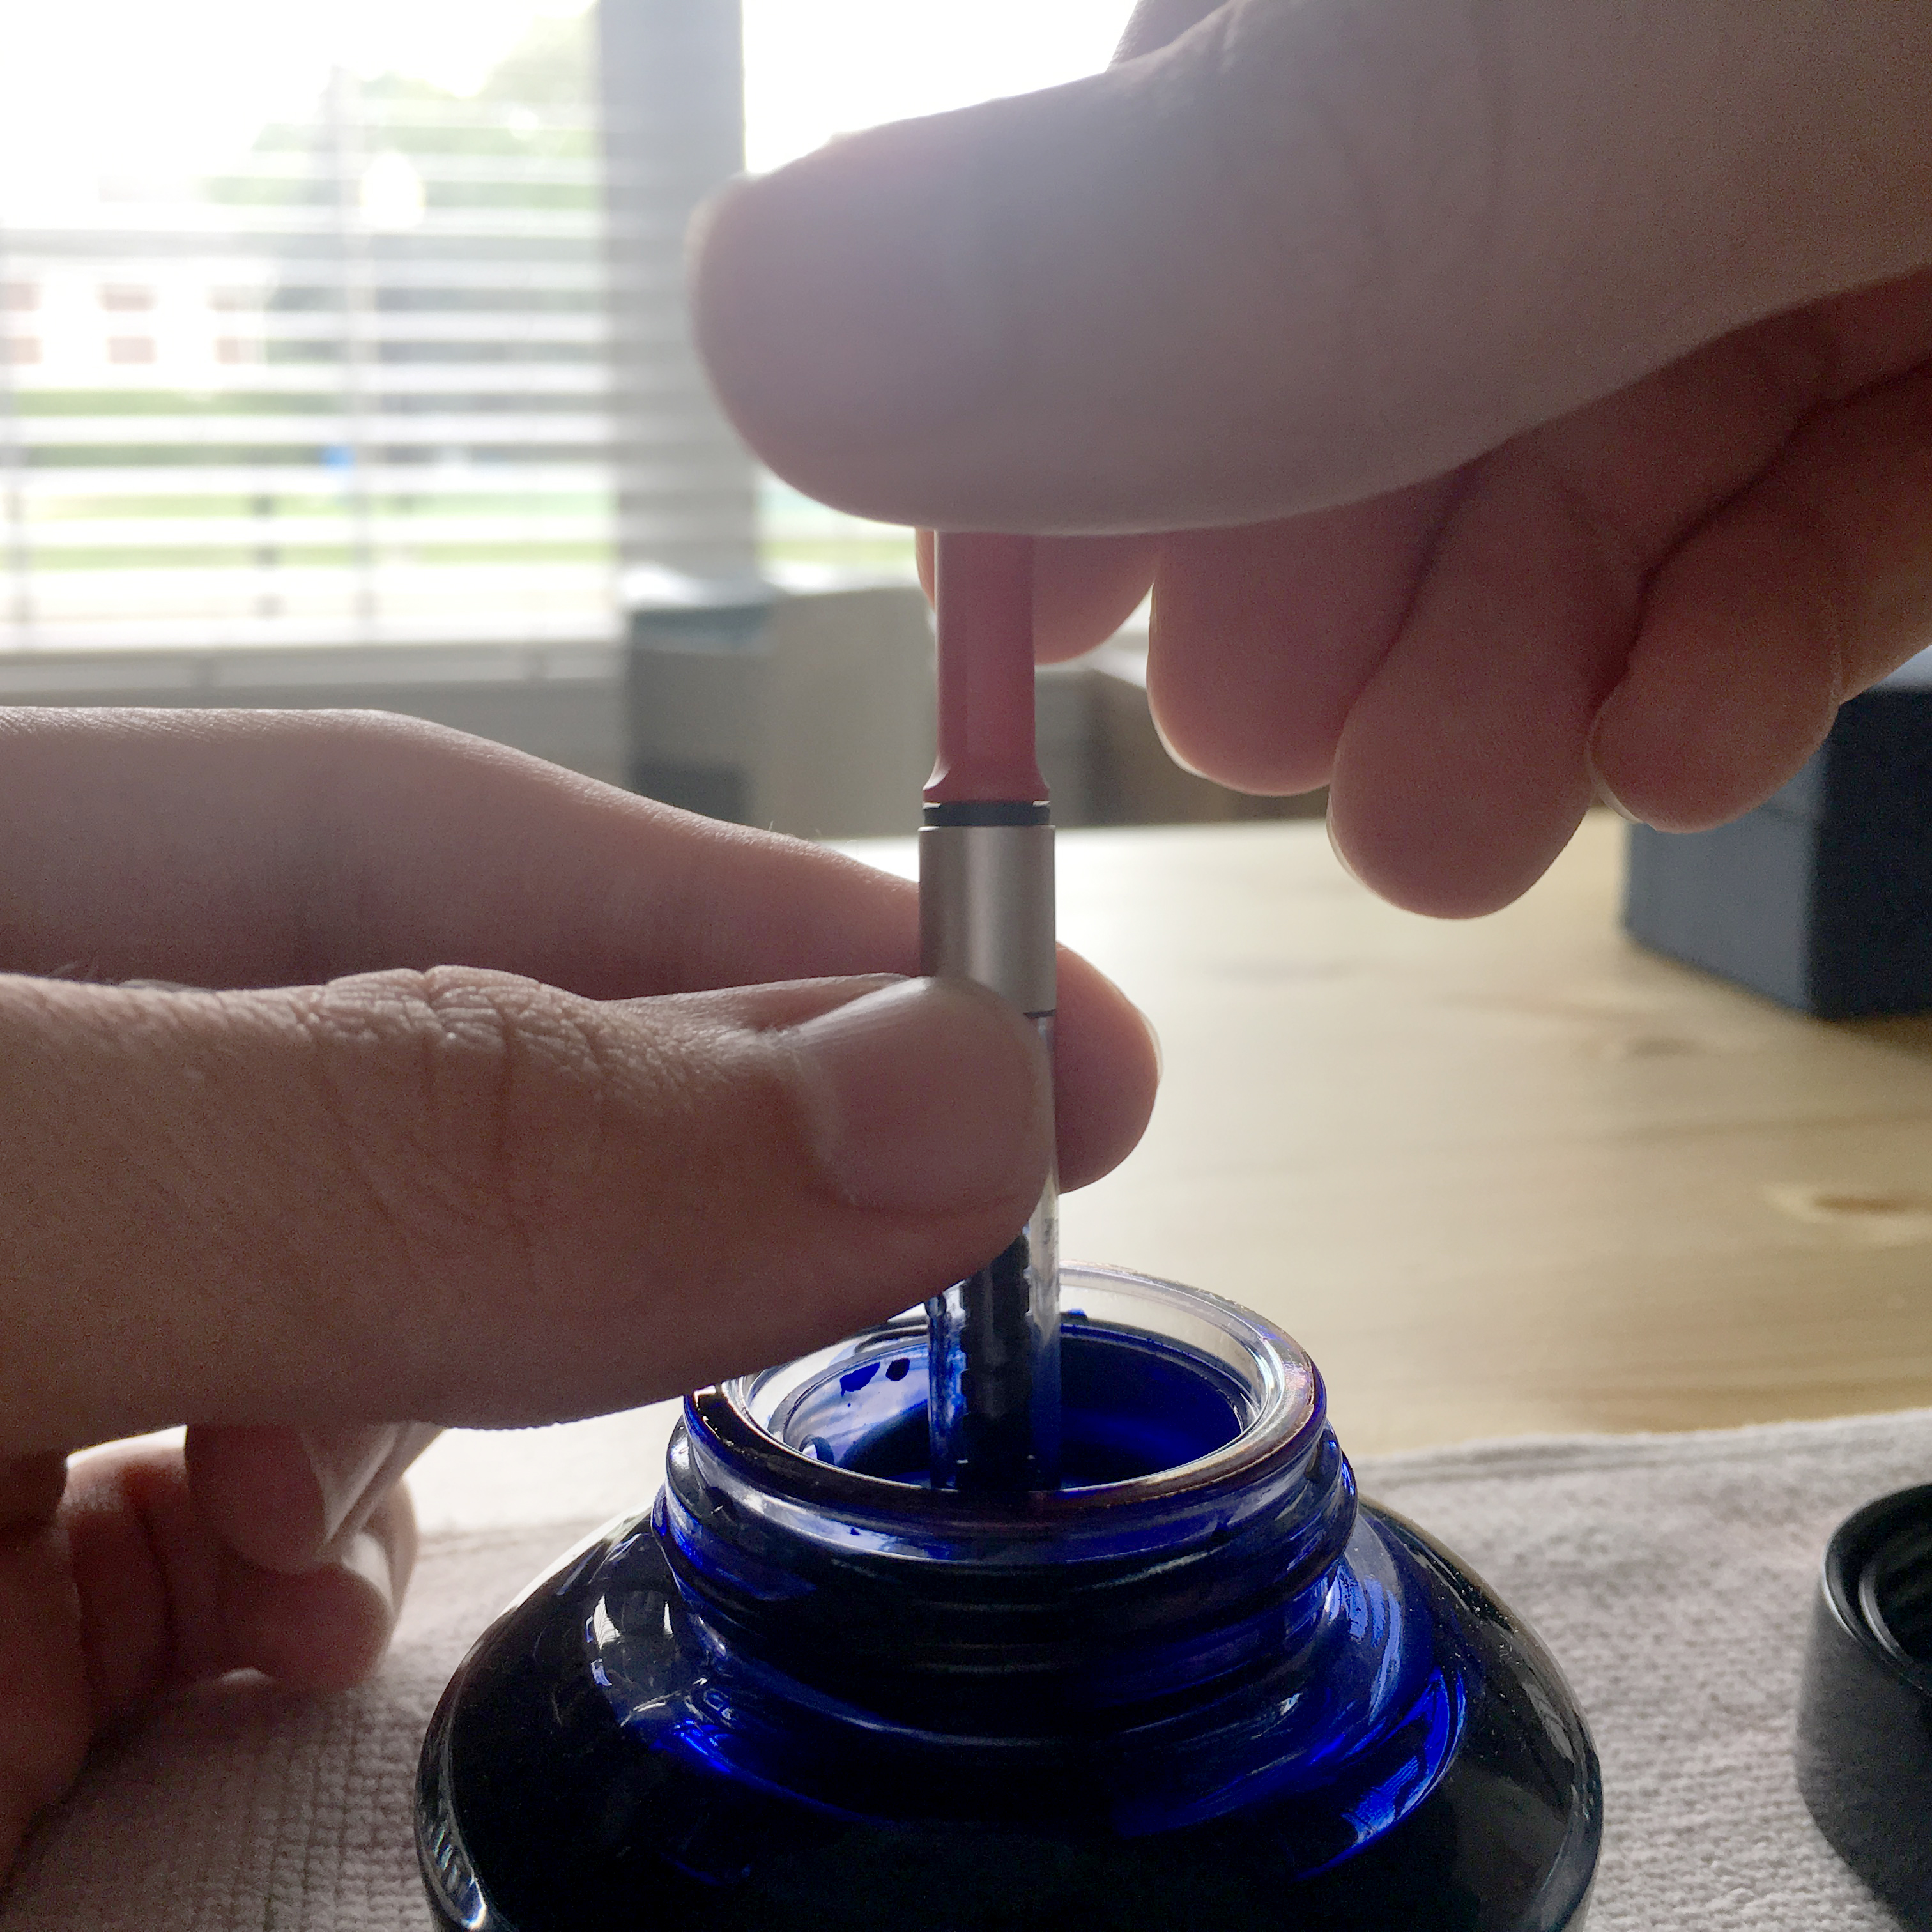
Carefully dip your converter cartridge or pen nib into ink reservoir and refill. (A piston converter twists) (A squeeze converter is squeezed)
Reassemble your pen and perform tests on scratch paper.
What kind of ink is best to refill your fountain pen?
Sailor ink is super smooth!
Not all inks are capable of refilling your fountain pen! Do some research before you go and fill your fountain pen with any old ink from the local Hobby Lobby. In fact, if you choose wrong, you’ll destroy your fountain pen for good!
You can always play it safe and purchase official replacement cartridges from your pen manufacturer. But if you want to choose your own ink, Sailor ink has served me especially well over the last few months. The possibilities really open up when you choose your own materials. Especially if you use waterproof inks for watercolors and ink washes.
You want to avoid any ink spills if possible. Before taking everything apart, lay down an old rag or a paper towel. In this tutorial you’ll see my awesome blue Lamy Safari pen. Lamy makes awesome introductory level fountain pens a range of ultra premium pens as well.
Every pen is a little bit different, but you should generally expect a similar procedure with whatever pen you have. Remove the cap, unscrew the barrel and separate it from the reservoir. Then you can pull out the cartridge.
This is a good time to clean your pen. Especially if you are switching colors or brands of ink. Get a simple cleaning solution made specifically for fountain pen maintenance. Before running solution through the pen, simply run warm water. If you have a very expensive pen made from rare materials you may not want to use warm water.
I recommend a piston converter. It is like a syringe with a screw instead of a plunger. Simply twist to move liquid in and out of the chamber. You can also fill the converter with water/cleaning solution and twist it to force water through the barrel of your pen and out from under the nib. If the barrel is clean, I shake it out and blow it slightly. Dry it out to the best of your ability.
When your pen is dry, you can remove the nib by wrapping a piece of tape around it and carefully pulling it off. Clean and excess or dried ink off the nib and put it back on your pen.
Refill the converter with ink.
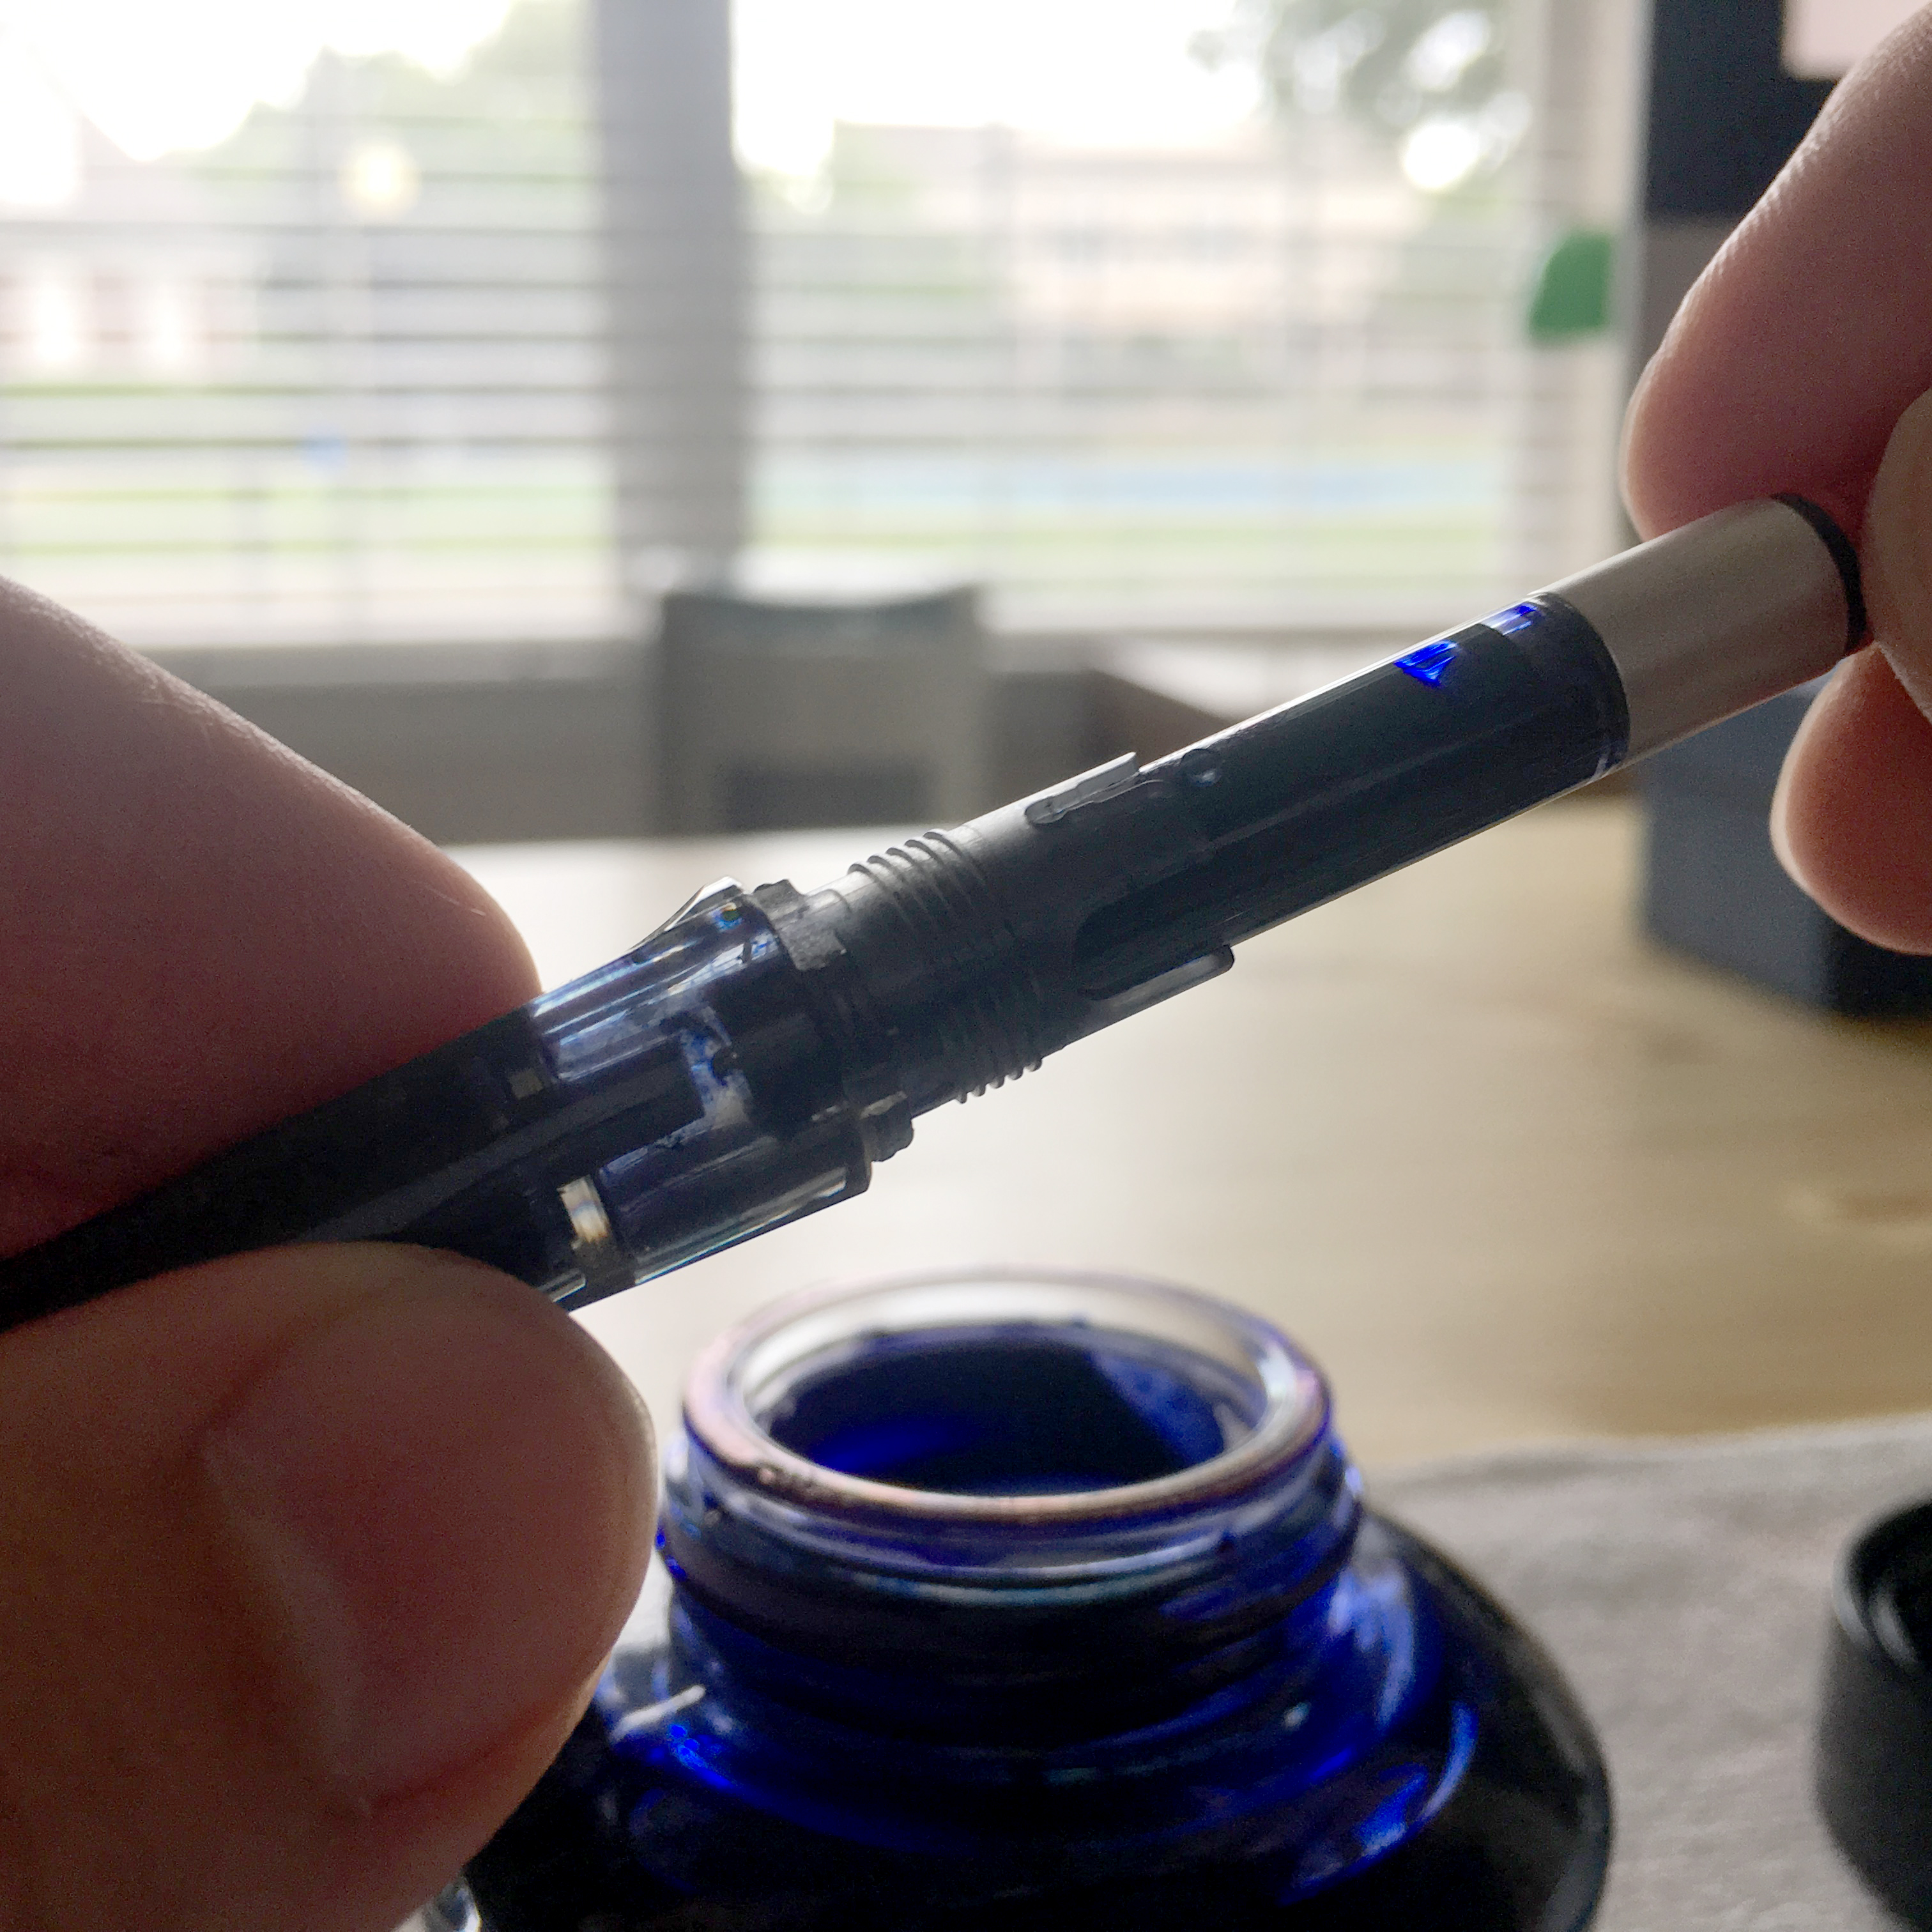
Now that your pen is cleaned, you can refill you converter. Make sure the piston is all the way at the bottom of the converter. Dip the end of the converter into your ink well and twist the piston so it fills will ink. Replace the piston into the barrel of the fountain pen and let gravity take care of the rest.
Some fountain pens are slightly different. Rather than dipping the piston, you can actually dip the nib into the ink well and twist the piston for the same effect. Just wipe the excess off the nib/pen when you do this. This is more common in higher end pens.
Make sure piston is extended all of the way
Carefully fill converter
Reinsert the converter
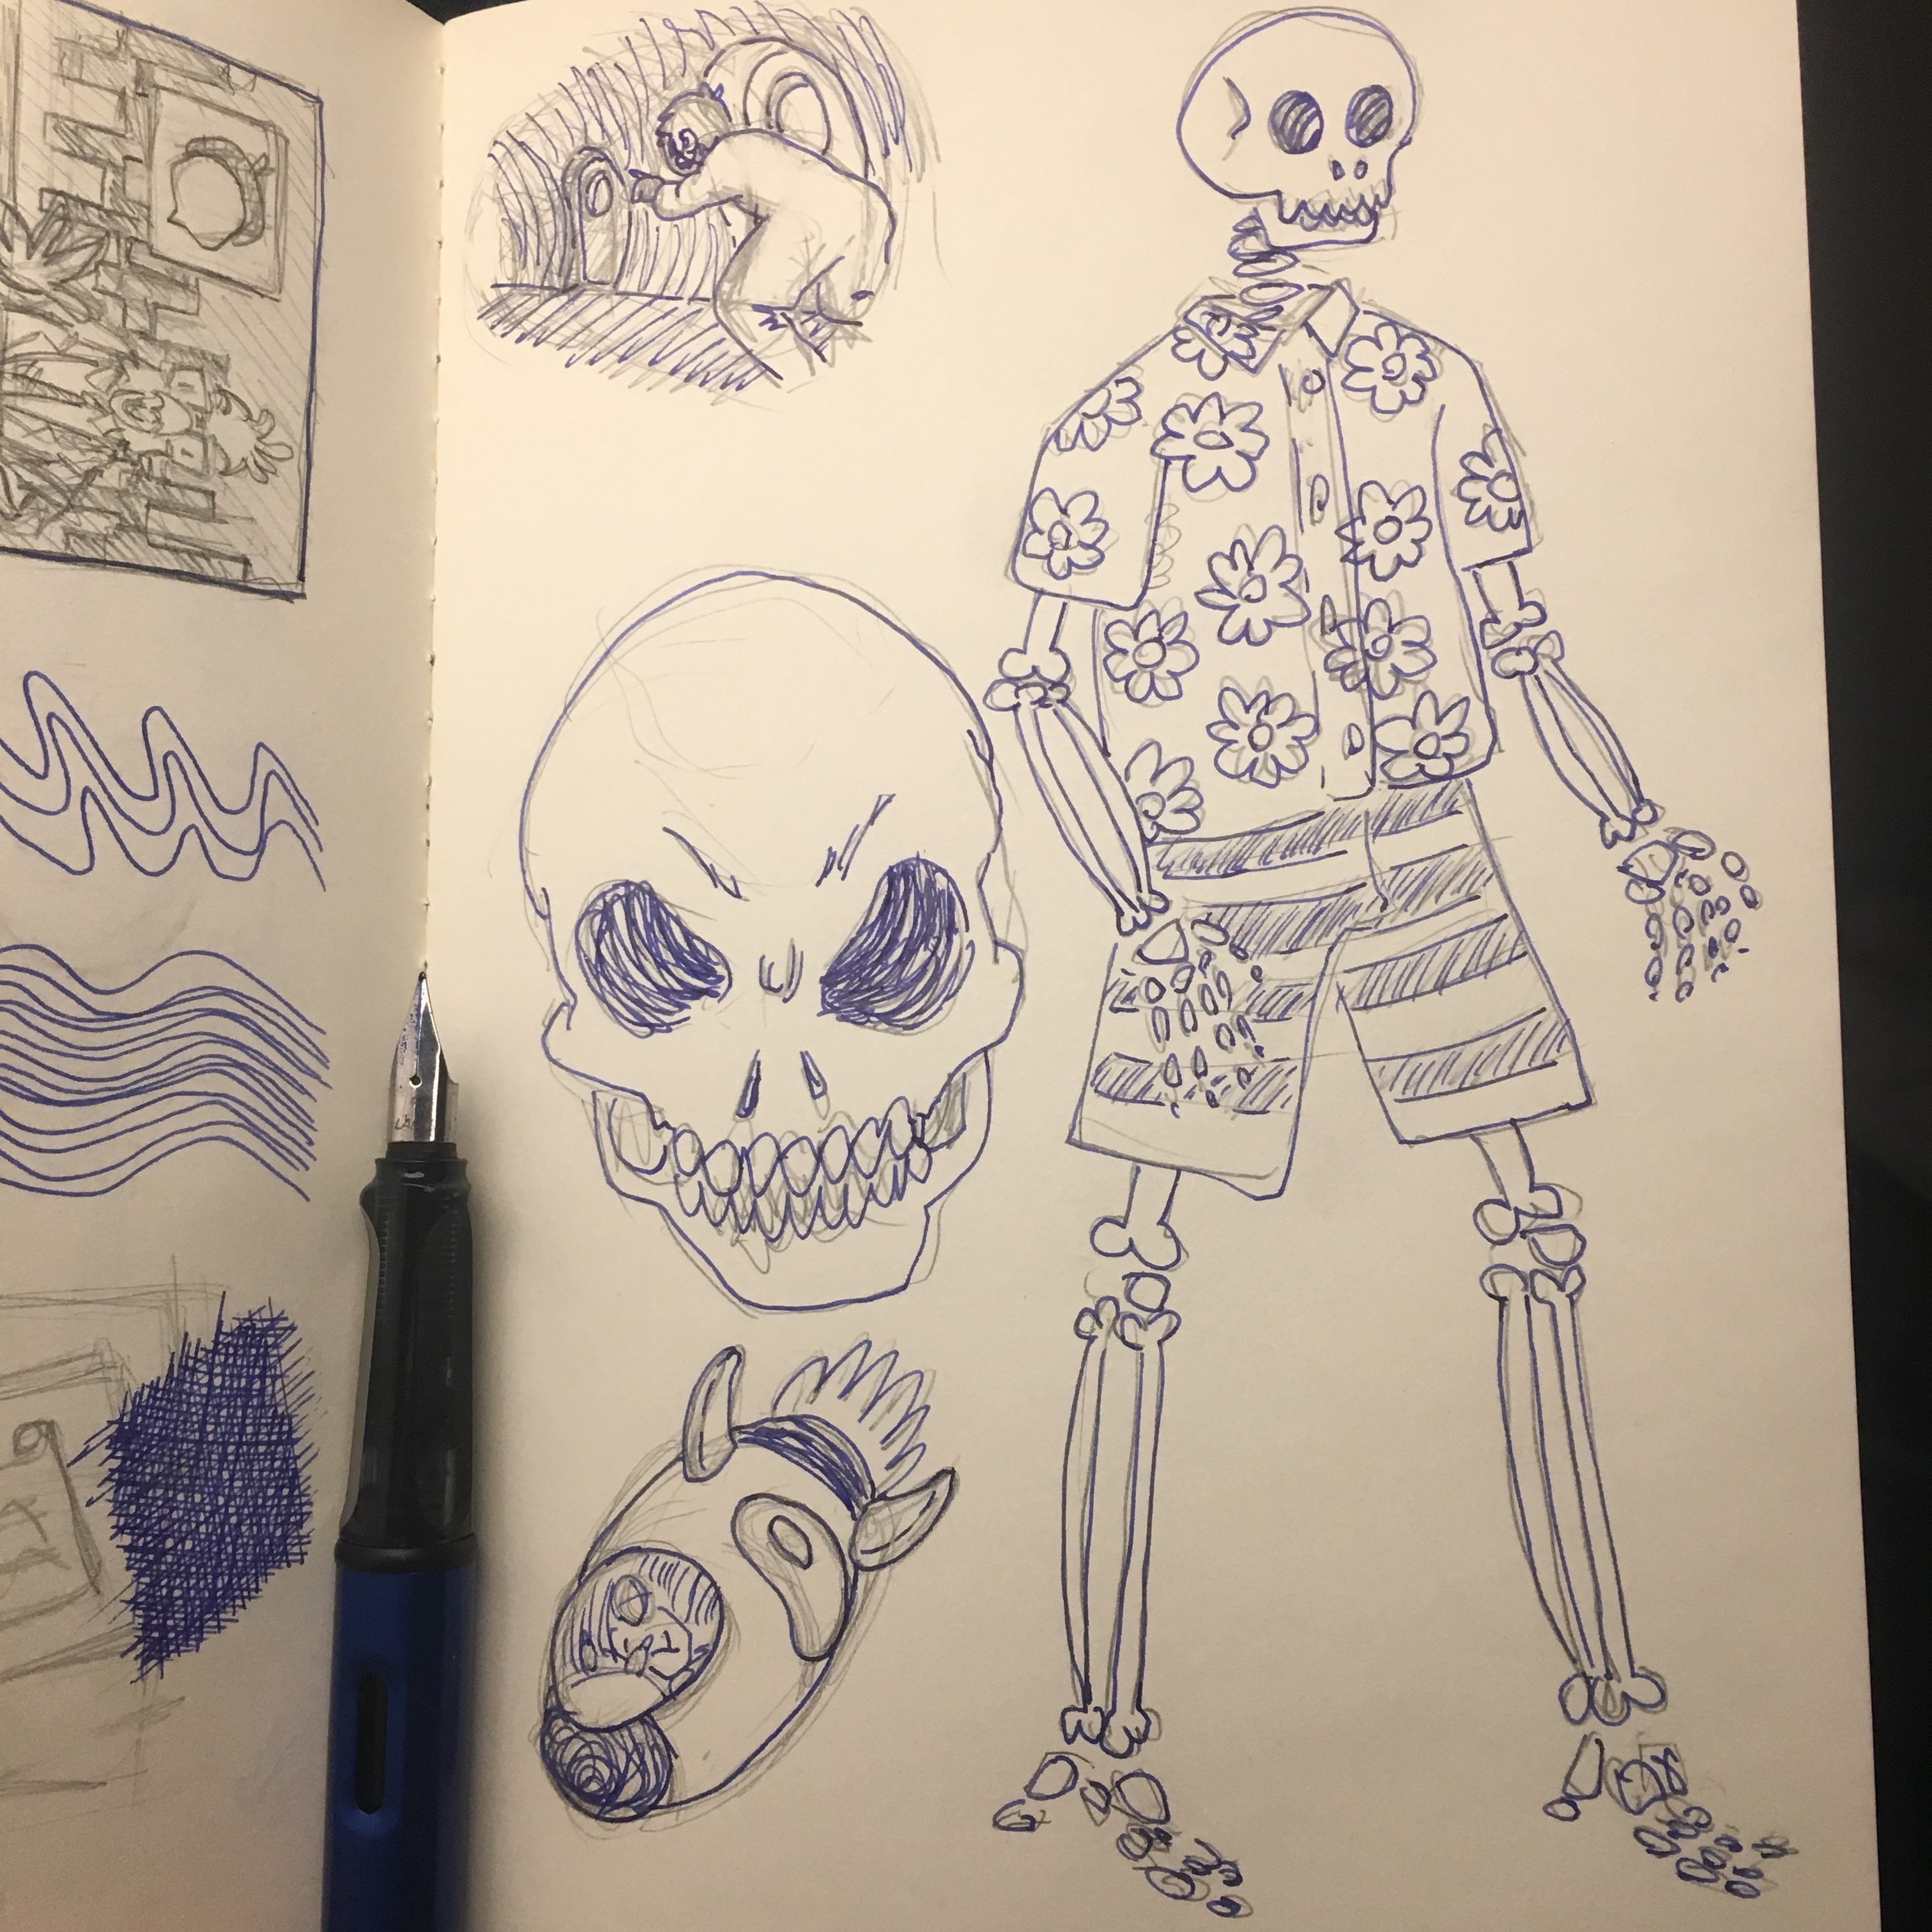
Take your refilled pen out for a test drive.
Make some marks with your pen and get the ink flowing. Some simple hatching or doodles should get the creative juices going. Depending on how you use your pen you may refill it fairly often. I refill my pen about every two weeks.
Test out your freshly refilled pen!
Doodlez
More doodlez
What sets fountain pens apart?
What makes a fountain pen different?
Fountain pens were all the rage before ball point pens took over. But why are they making a comeback? For starters, improvements in the craft are allowing them to leak a lot less than they used to. Fast drying inks that don’t clog have also come a long way in recent years. But the biggest reason for the comeback is probably just hipsters wanting to set themselves apart(haha).
I really enjoy carrying my fountain pen to and from the office everyday. This pen is kind of like an accessory to my smart phone in the way it’s always near. I can’t explain why I love doodling with this pen. Maybe it’s because it takes a lot of TLC to keep one of these pens going for a long time.
Here is a free and easy way to get your art directly on your iPad with no hassle. Scanners can be expensive for new artists, but there are free alternatives out there on the web.
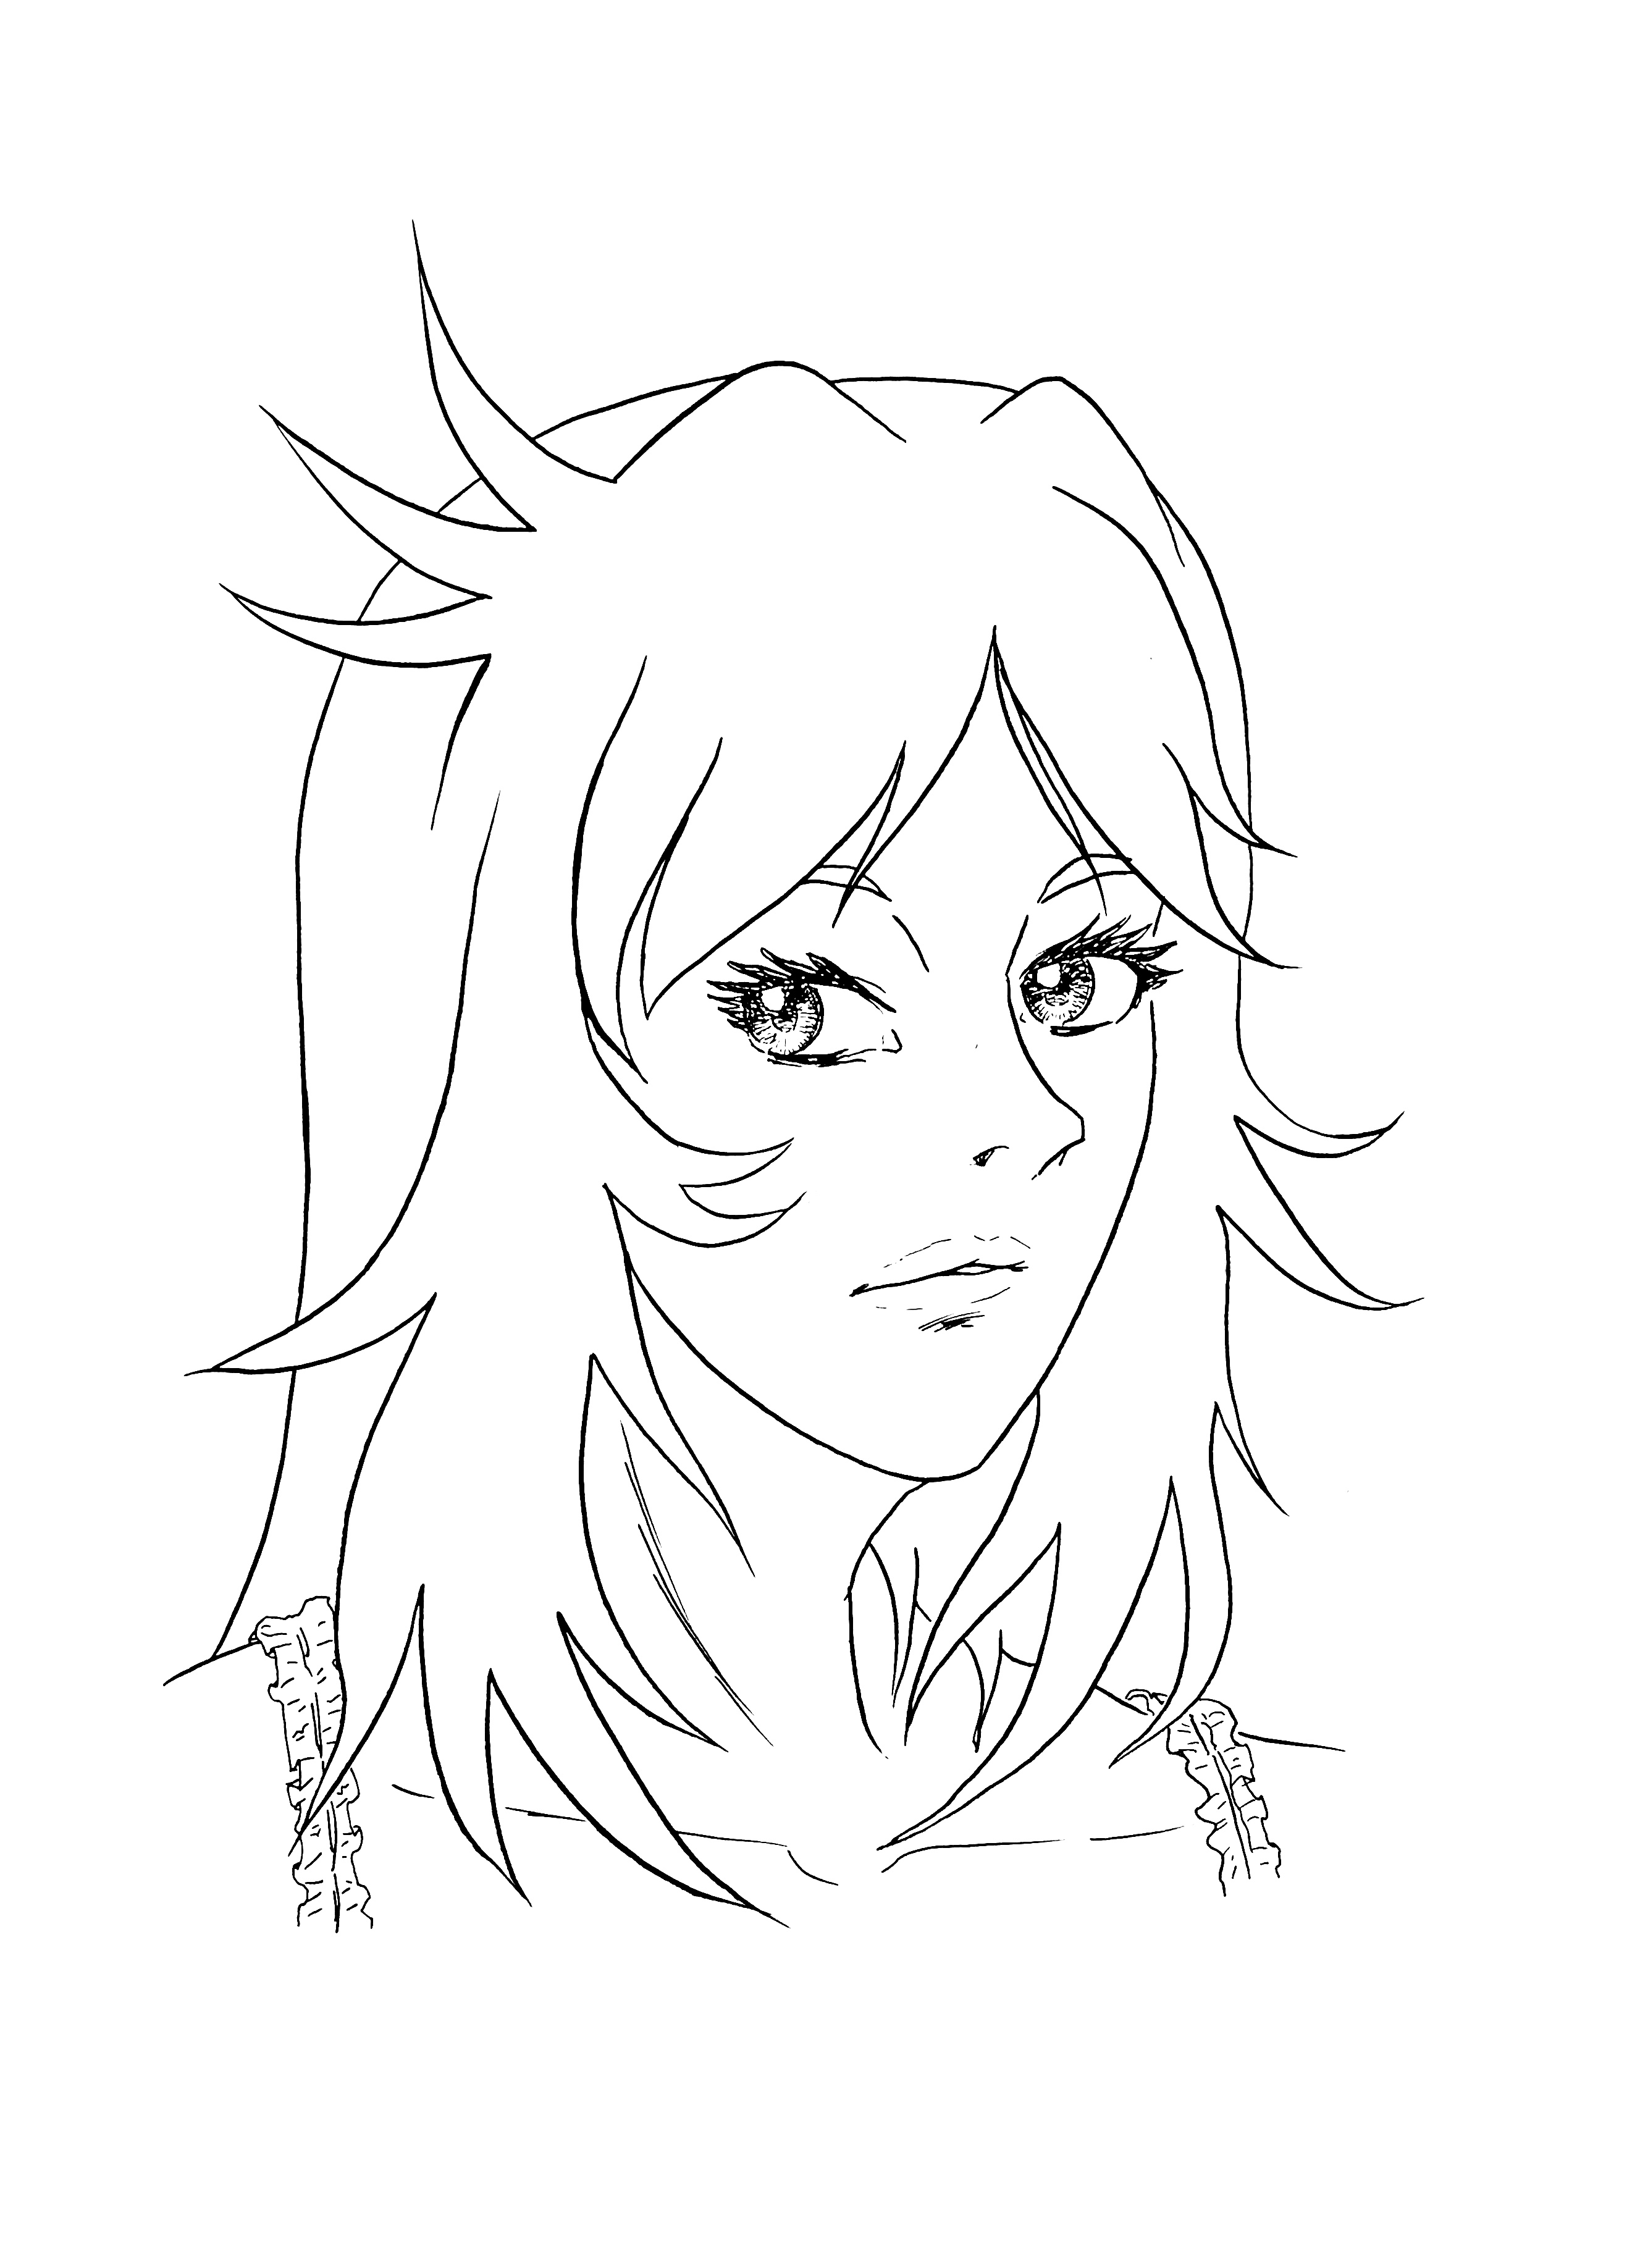
Draw to your heart’s content. For the sake of this tutorial I am using the line art from a previous tutorial I made that was all about making traditional line art.
2. Download the FREE iScanner App
I used two apps for demonstration purposes. The first app was bundled with my platen glass scanner in my home office. While the second was the free iScanner app. Below is a side by side comparison of the platen glass(top) and the iScanner app(bottom). I was honestly surprised at how well the iScanner app performed when I first downloaded it. I could have easily used either scan for the final work. The iScanner app has the slight disadvantage of being limited to the 12 megapixel camera on the iPad. But if you are making webcomics, or you are used to doing digital paint overs, the iScanner app is going to suit you exceedingly well!
Traditional scanner
iScanner App
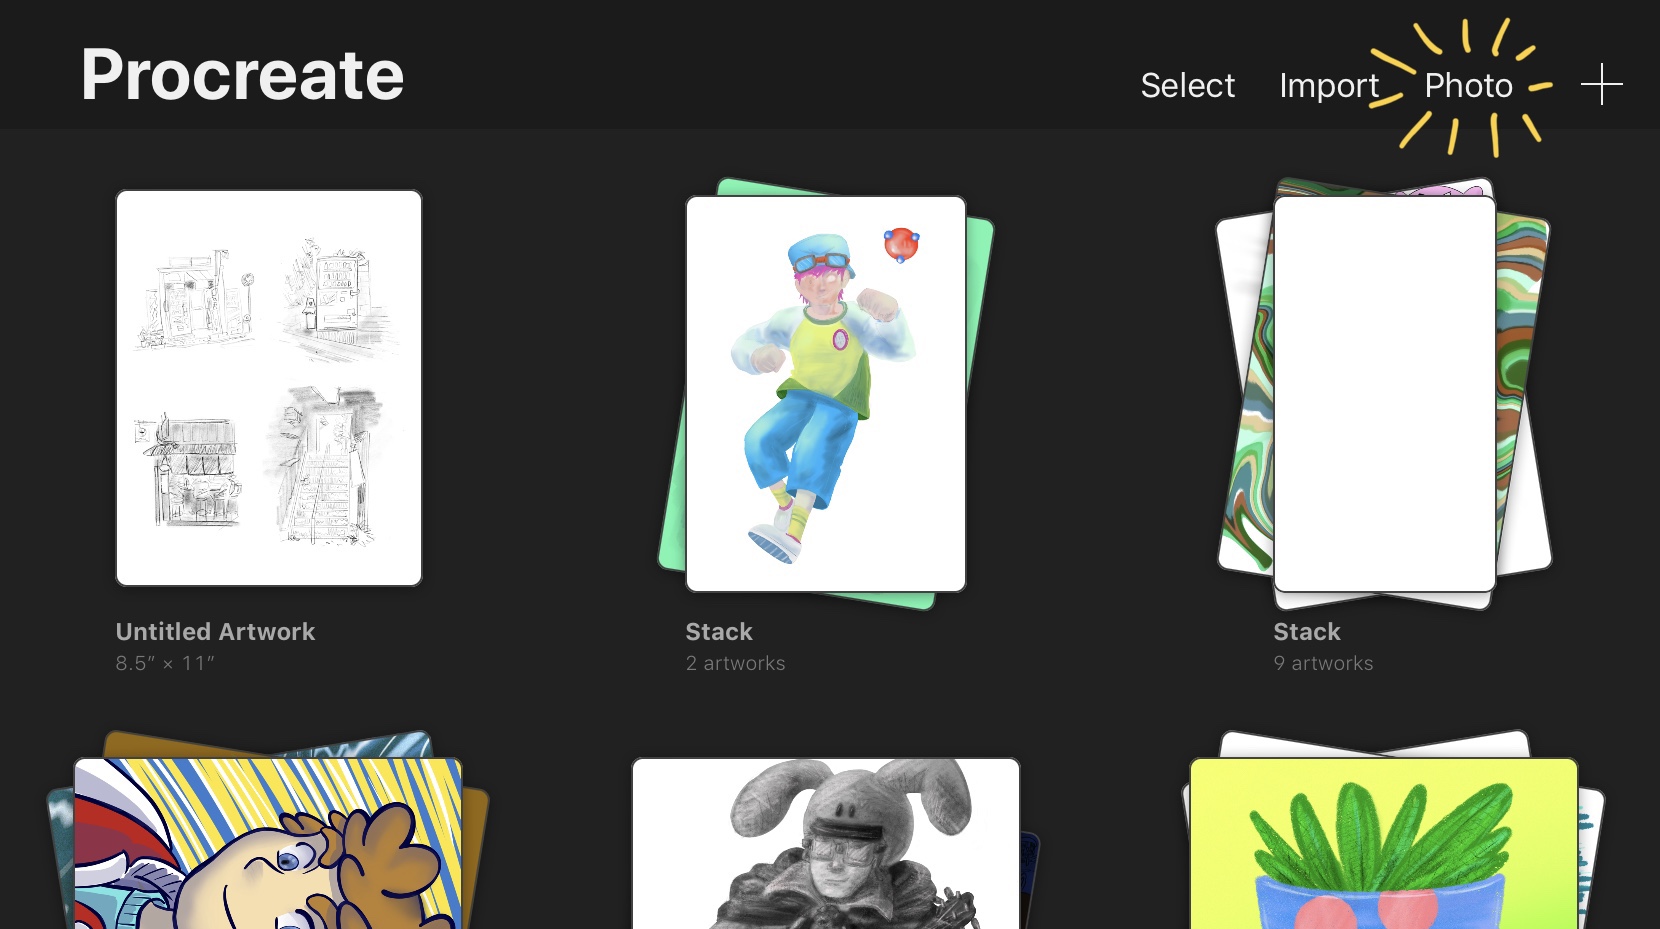
3. Import new scan to Procreate
Procreate is an amazing, affordable, and powerful digital painting tool that turns your iPad into a canvas when paired with the Apple Pencil. Follow the steps below to import a photo to your Procreate canvas so you can finish your masterpiece. Simply open the gallery and select Photo and then browse your camera roll for the scanned image from iScanner.
Tap Photo
Select iScanner image
4. Add the finishing touches
Take you time and enjoy the rest of your creative process. My finished piece is below. If you like tutorials like this feel free to visit our home page. If you have questions or suggestions for future topics feel free to email at dallasdraws@gmail.com
Making clean line art can be frustrating, but it is really easy if you follow this simple 3-step tutorial. If you haven’t been using the technique show below, you’ll see an improvement almost overnight!
Before You Start: Tools for Great Line Art
Building your tool chest is important, but don’t fret if you don’t have these exact tools. The process is more important than specific tools in the end, but these basics are easy to cover!
1. Pencils of all Shapes and Sizes
The favorite sketching pencil of manga artists all over the world is a simple BIC brand mechanical pencil. Its simple design has stood the test of time for decades on end. The box featured in this link is only about $7 for 40 pencils with lead. I’ve been going through the same box for over a year and I think it’ll last me at least two more years. The other pencils photographed are awesome as well, but I’ll write more about fine quality Tombow MONO pencil and Staedtler’s mechanical clutch pencil on a later date.
World’s Best Pencil
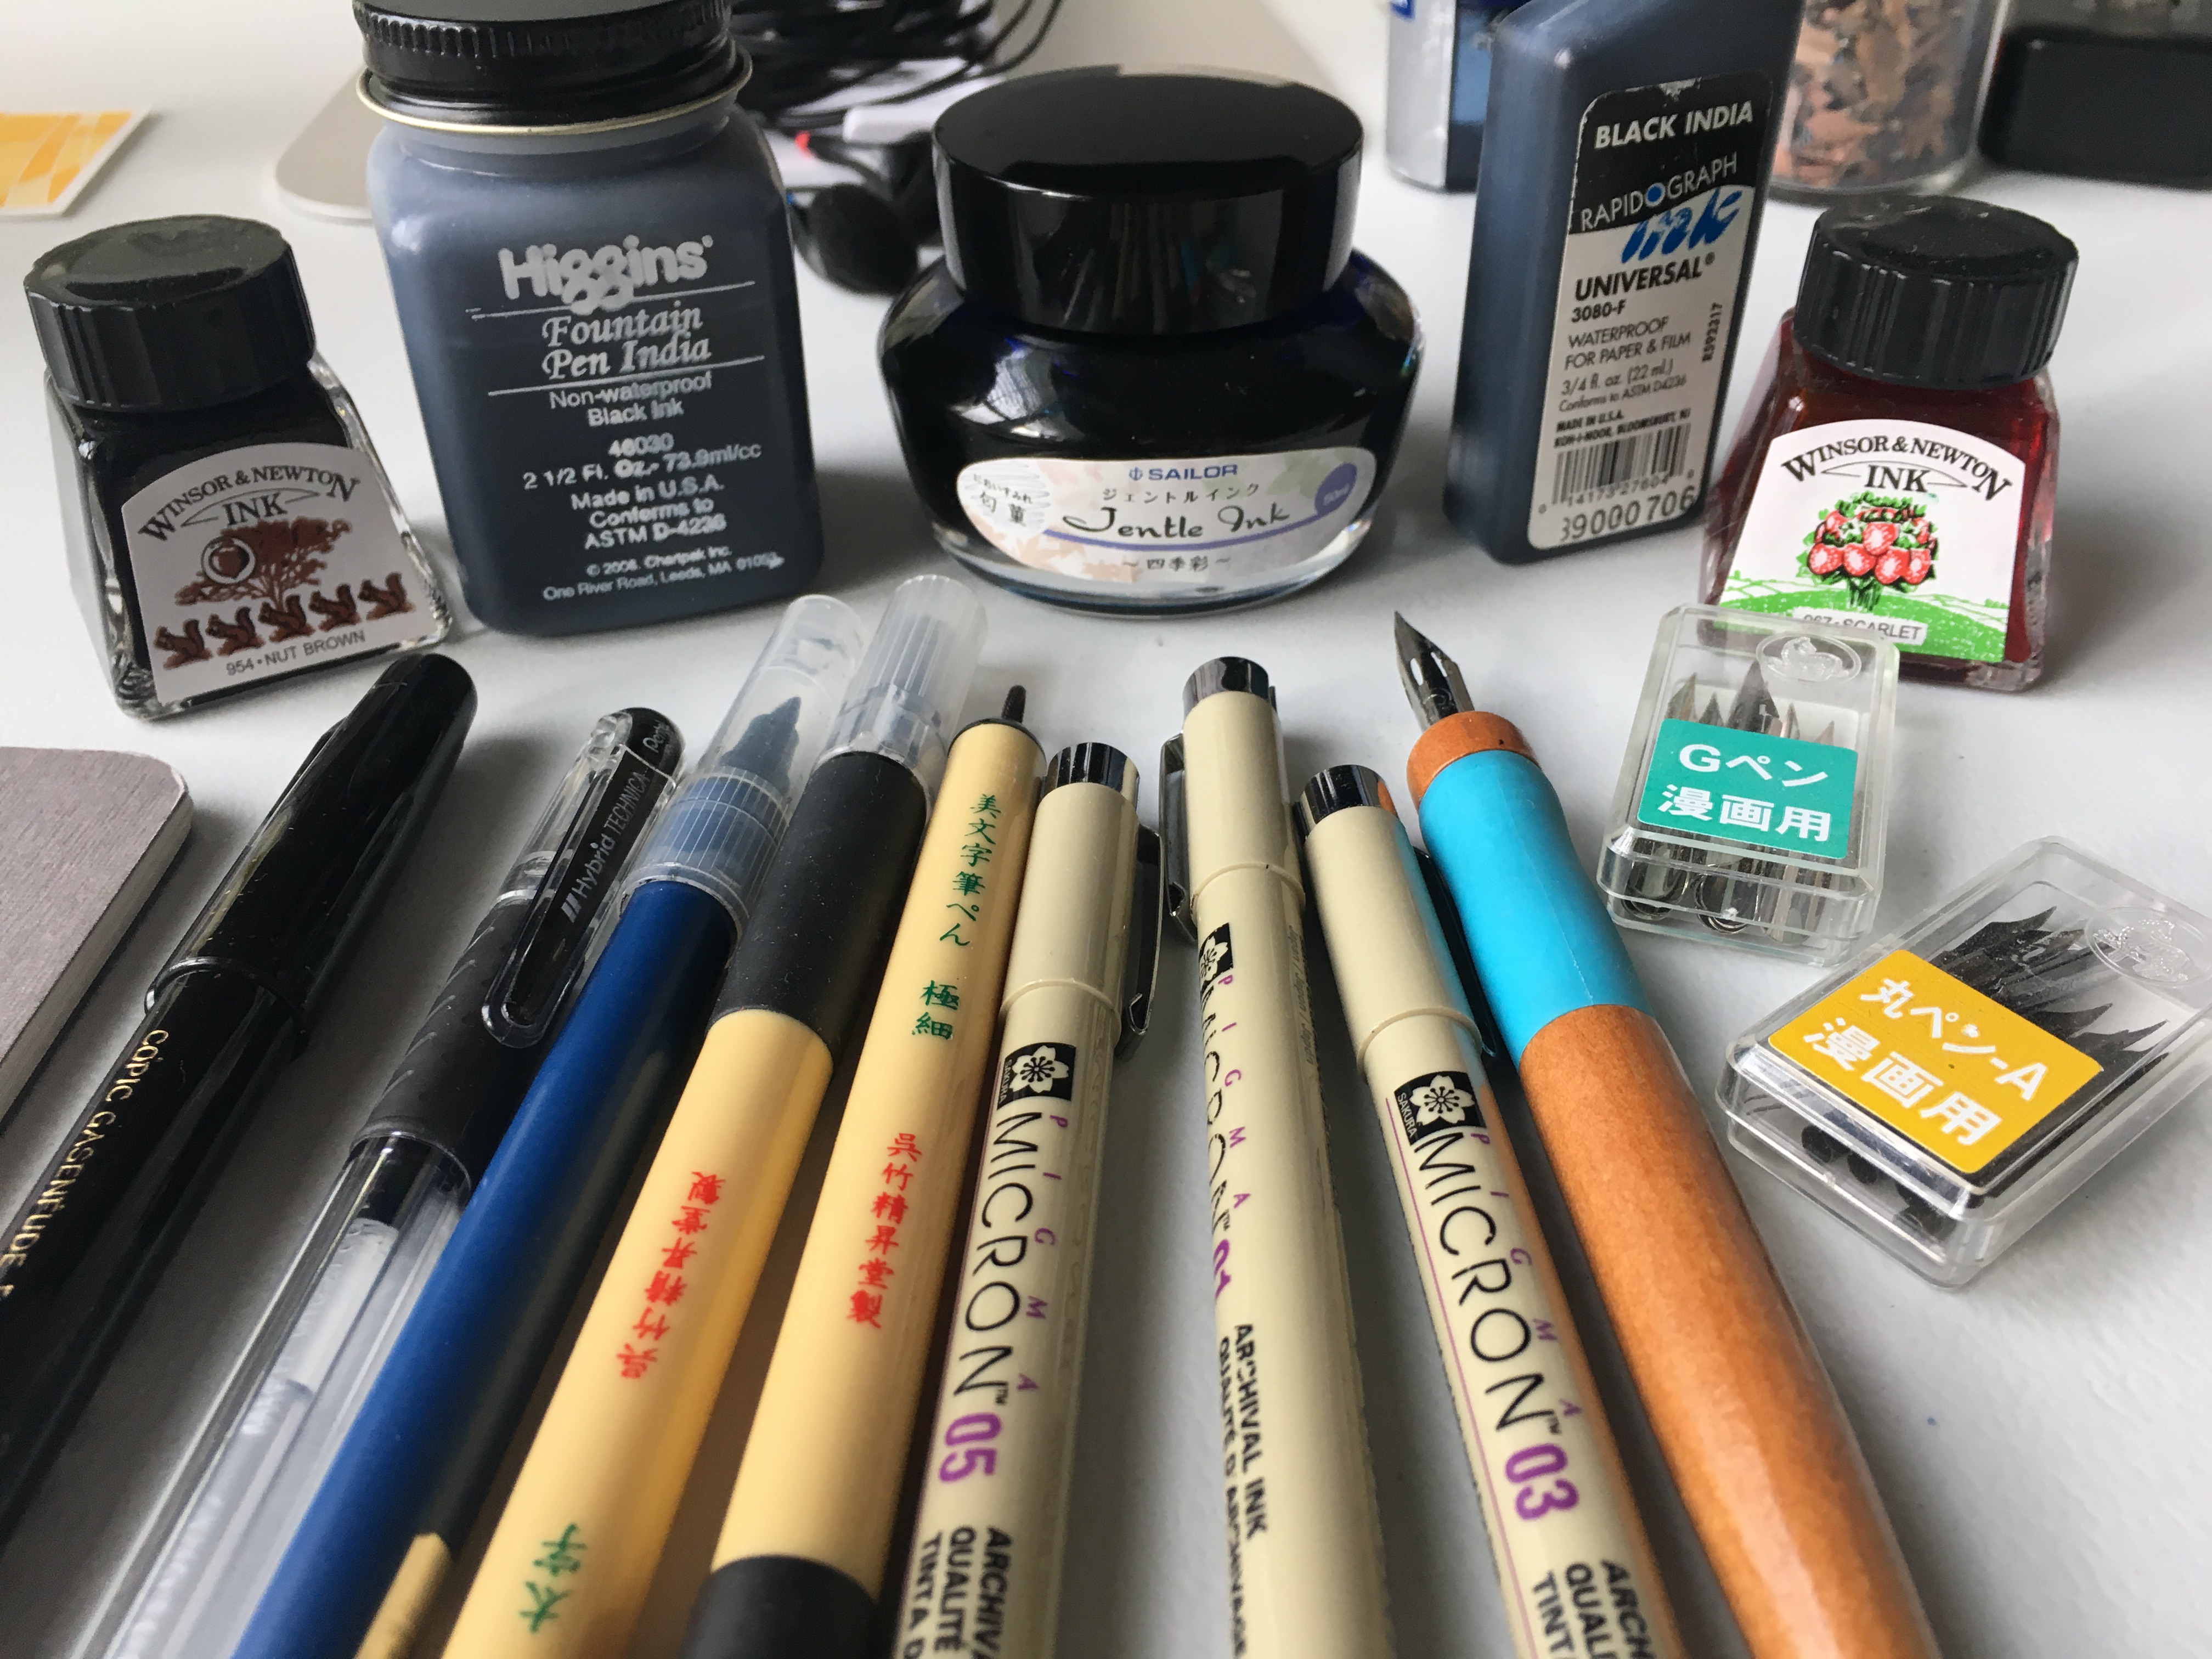
2. Inking Pens and Brushes
All My Favorite Ink Pens
You’ll see I have MANY different types of inking devices to choose from. I usually recommend beginners start with Microns. But the more advanced your technique becomes the more variety of ink pens you might choose from. The variety of pens and the marks they all can make are a subject for another day.
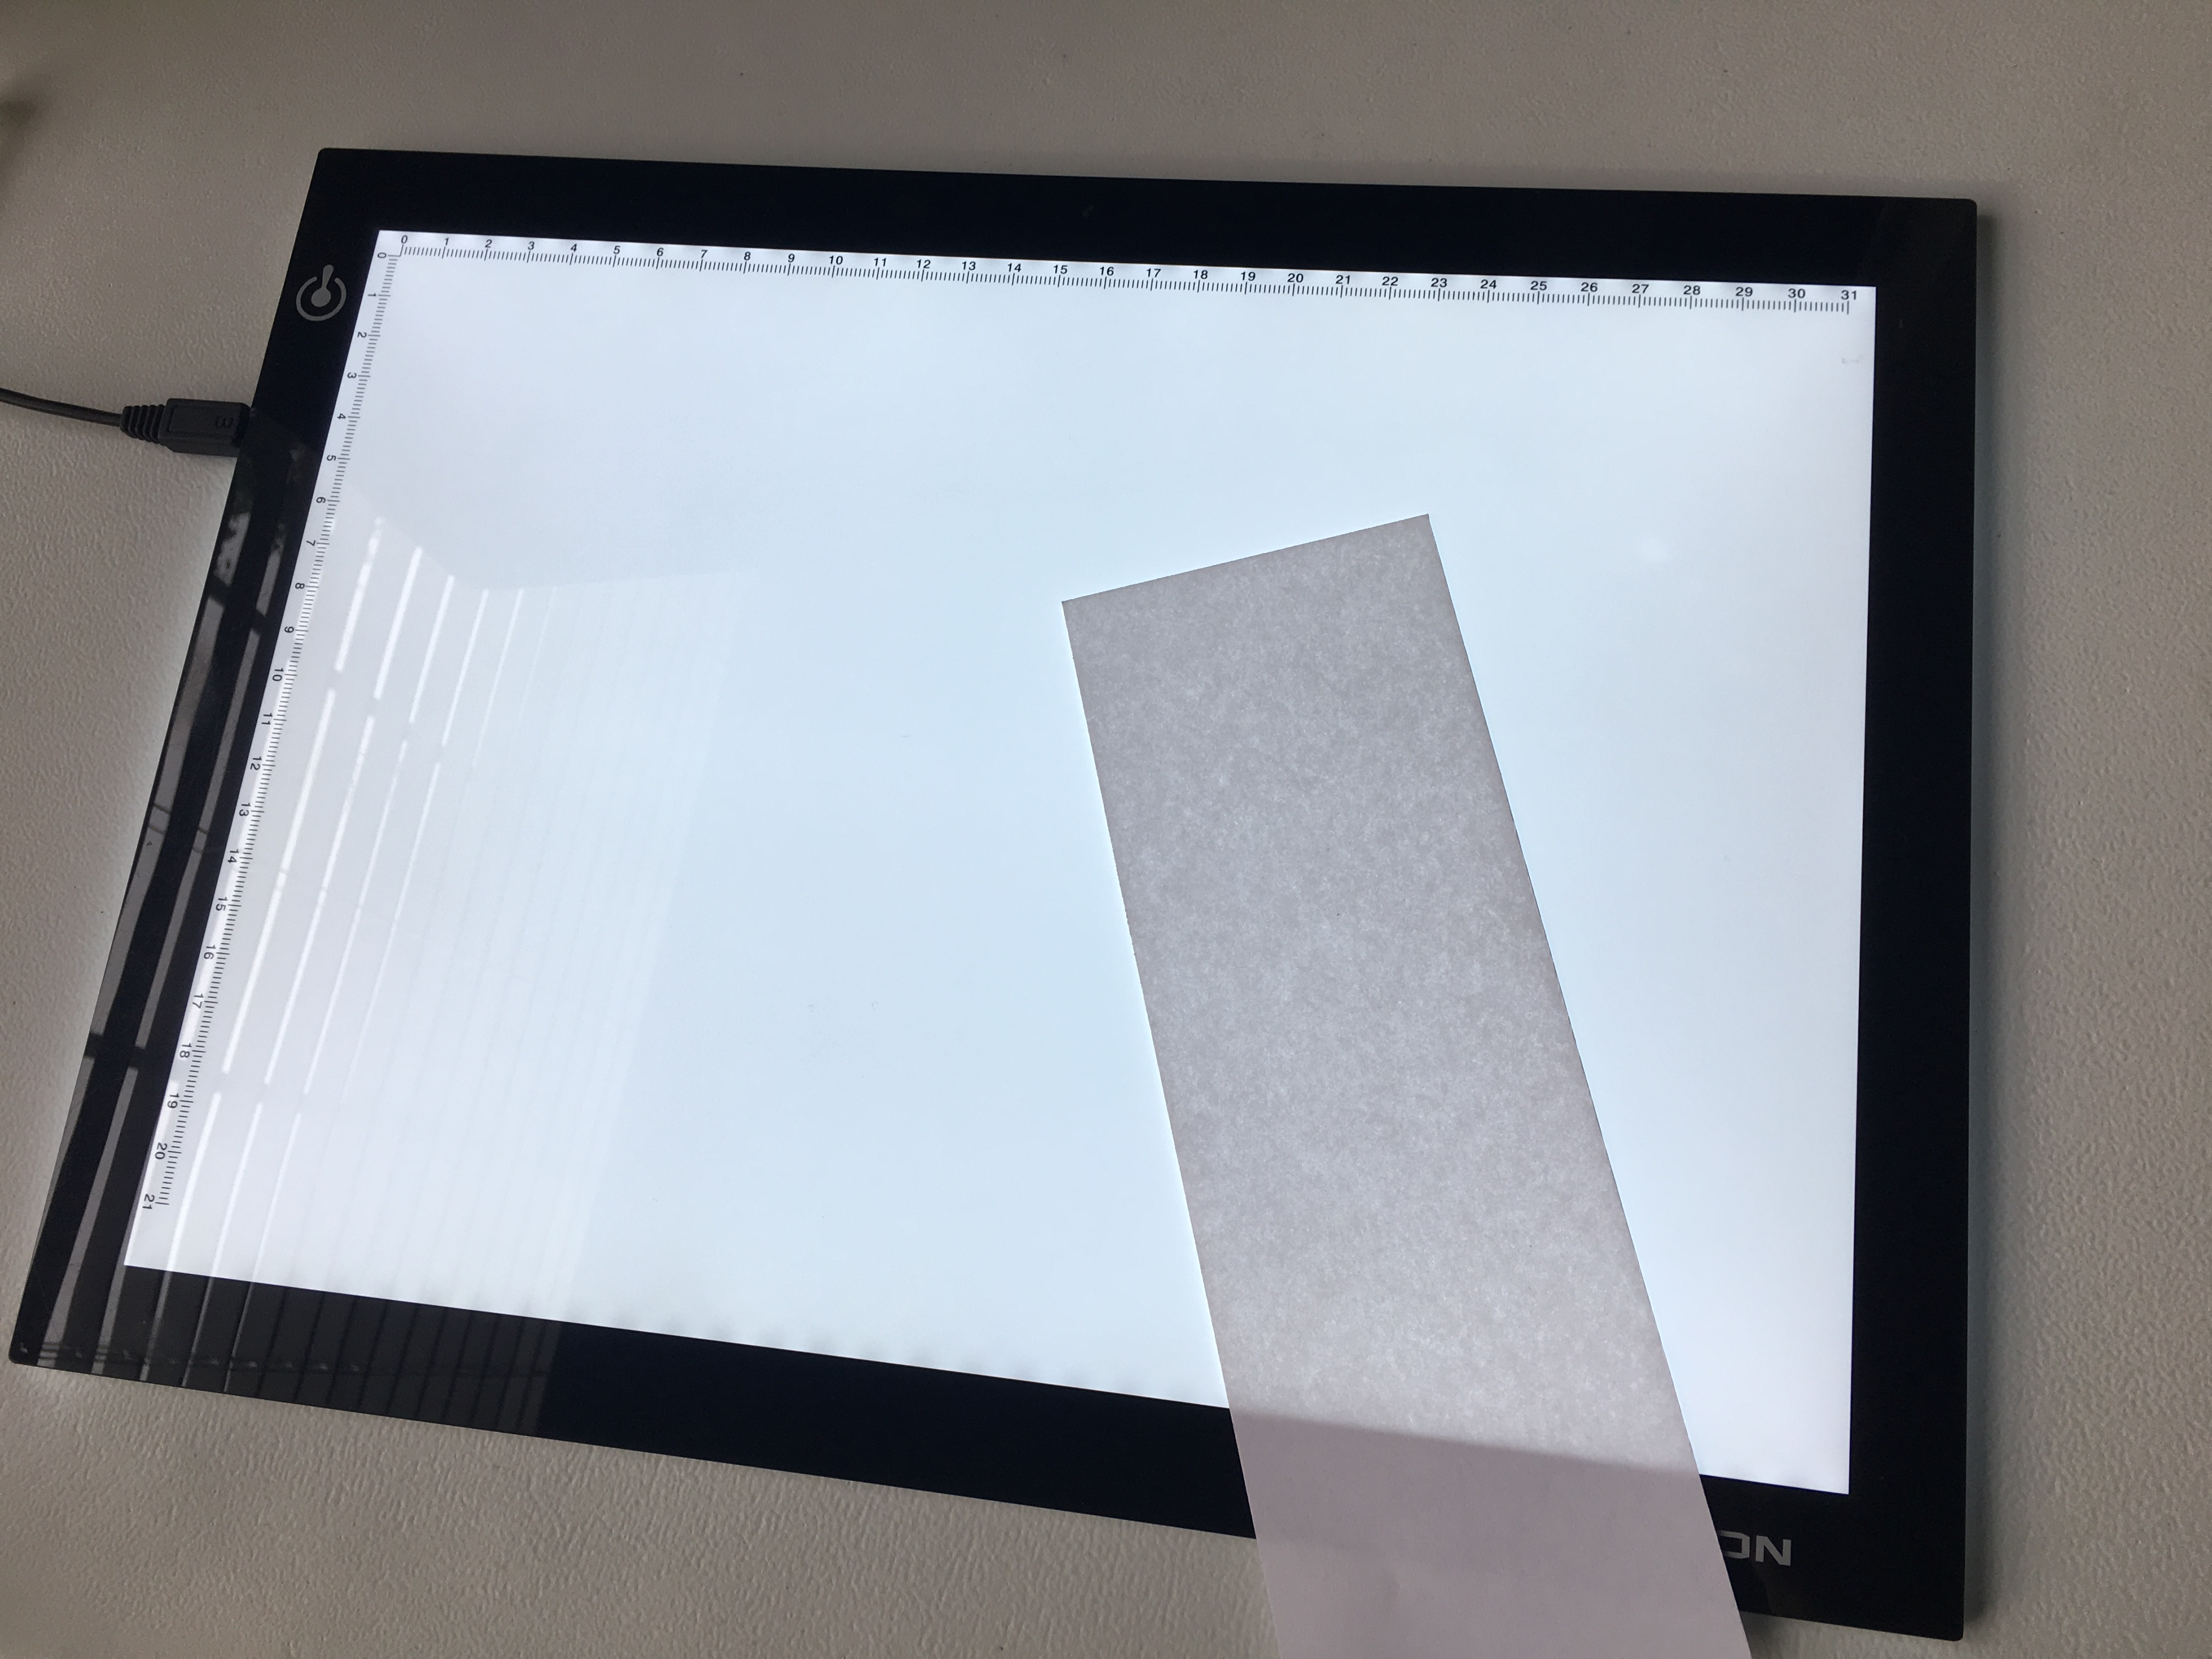
A light pad of some shape or size is 100% necessary for this tutorial. But you can also tape paper to an open window or a glass table with a lamp underneath it. I recommend the HUION brand if you want an affordable light pad that comes in many different sizes.
Copy paper is the timeless constant for sketching your ideas. I recommend copy paper because it is usually cheaper than sketchbooks per page. This box of copy paper is less than $20 for 1500 sheets which costs less than 1 cent a page. While this cheap sketchbook has only 100 pages for around $7 which is about 14 cents a page! I love carrying a sketchbook, but I like drawing more finished artworks in nice sketchbooks like these premium Moleskine sketchbooks. These are great sketchbooks, but reserve them for finished pieces. Copy paper is the king of rough sketching!!!
3-Step Inking Process
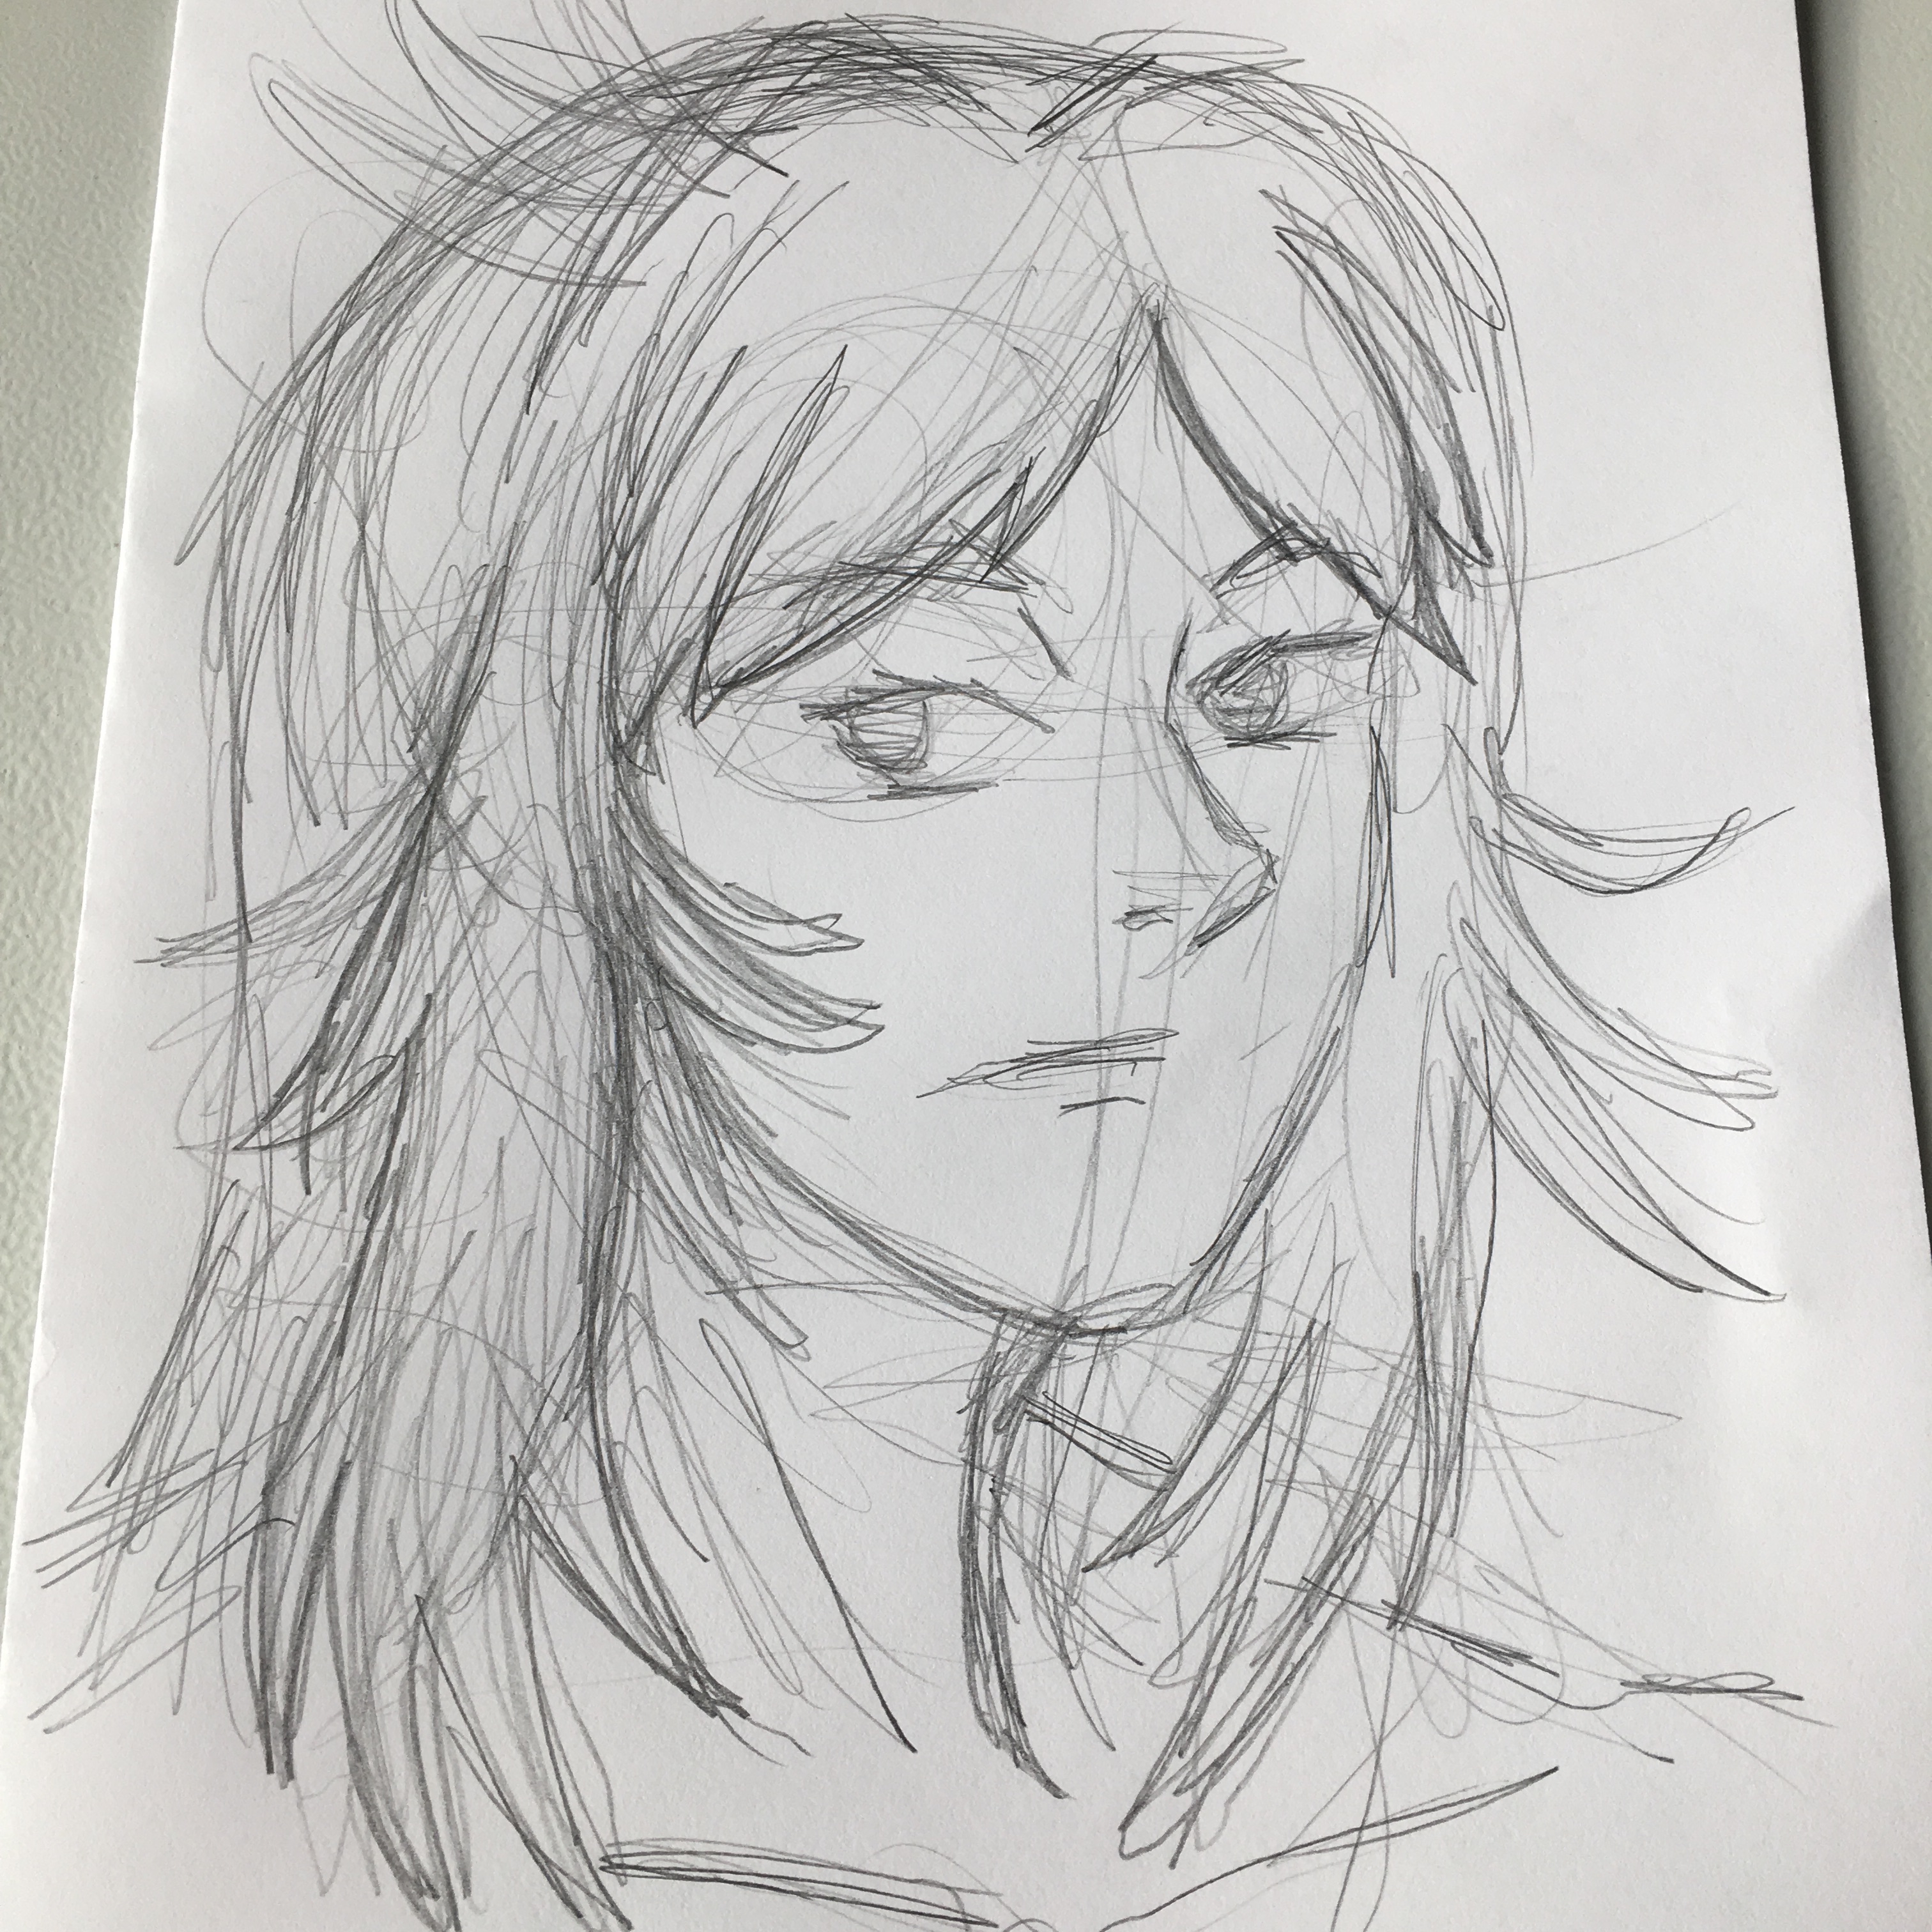
1. Start With a Rough Sketch
Grab your copy paper and get messy. No lines are sacred. This hazy sketch is like the marble you will carve your drawing out of. But this IS NOT the piece of paper your final art will be on. Many new artists waste hours of time erasing lines and choosing which lines are most vital to their drawing. You shouldn’t try to draw it perfectly the first time. Be bold now because you know you’re going to do it perfectly on the last round!
The rough sketch is exactly that; rough.
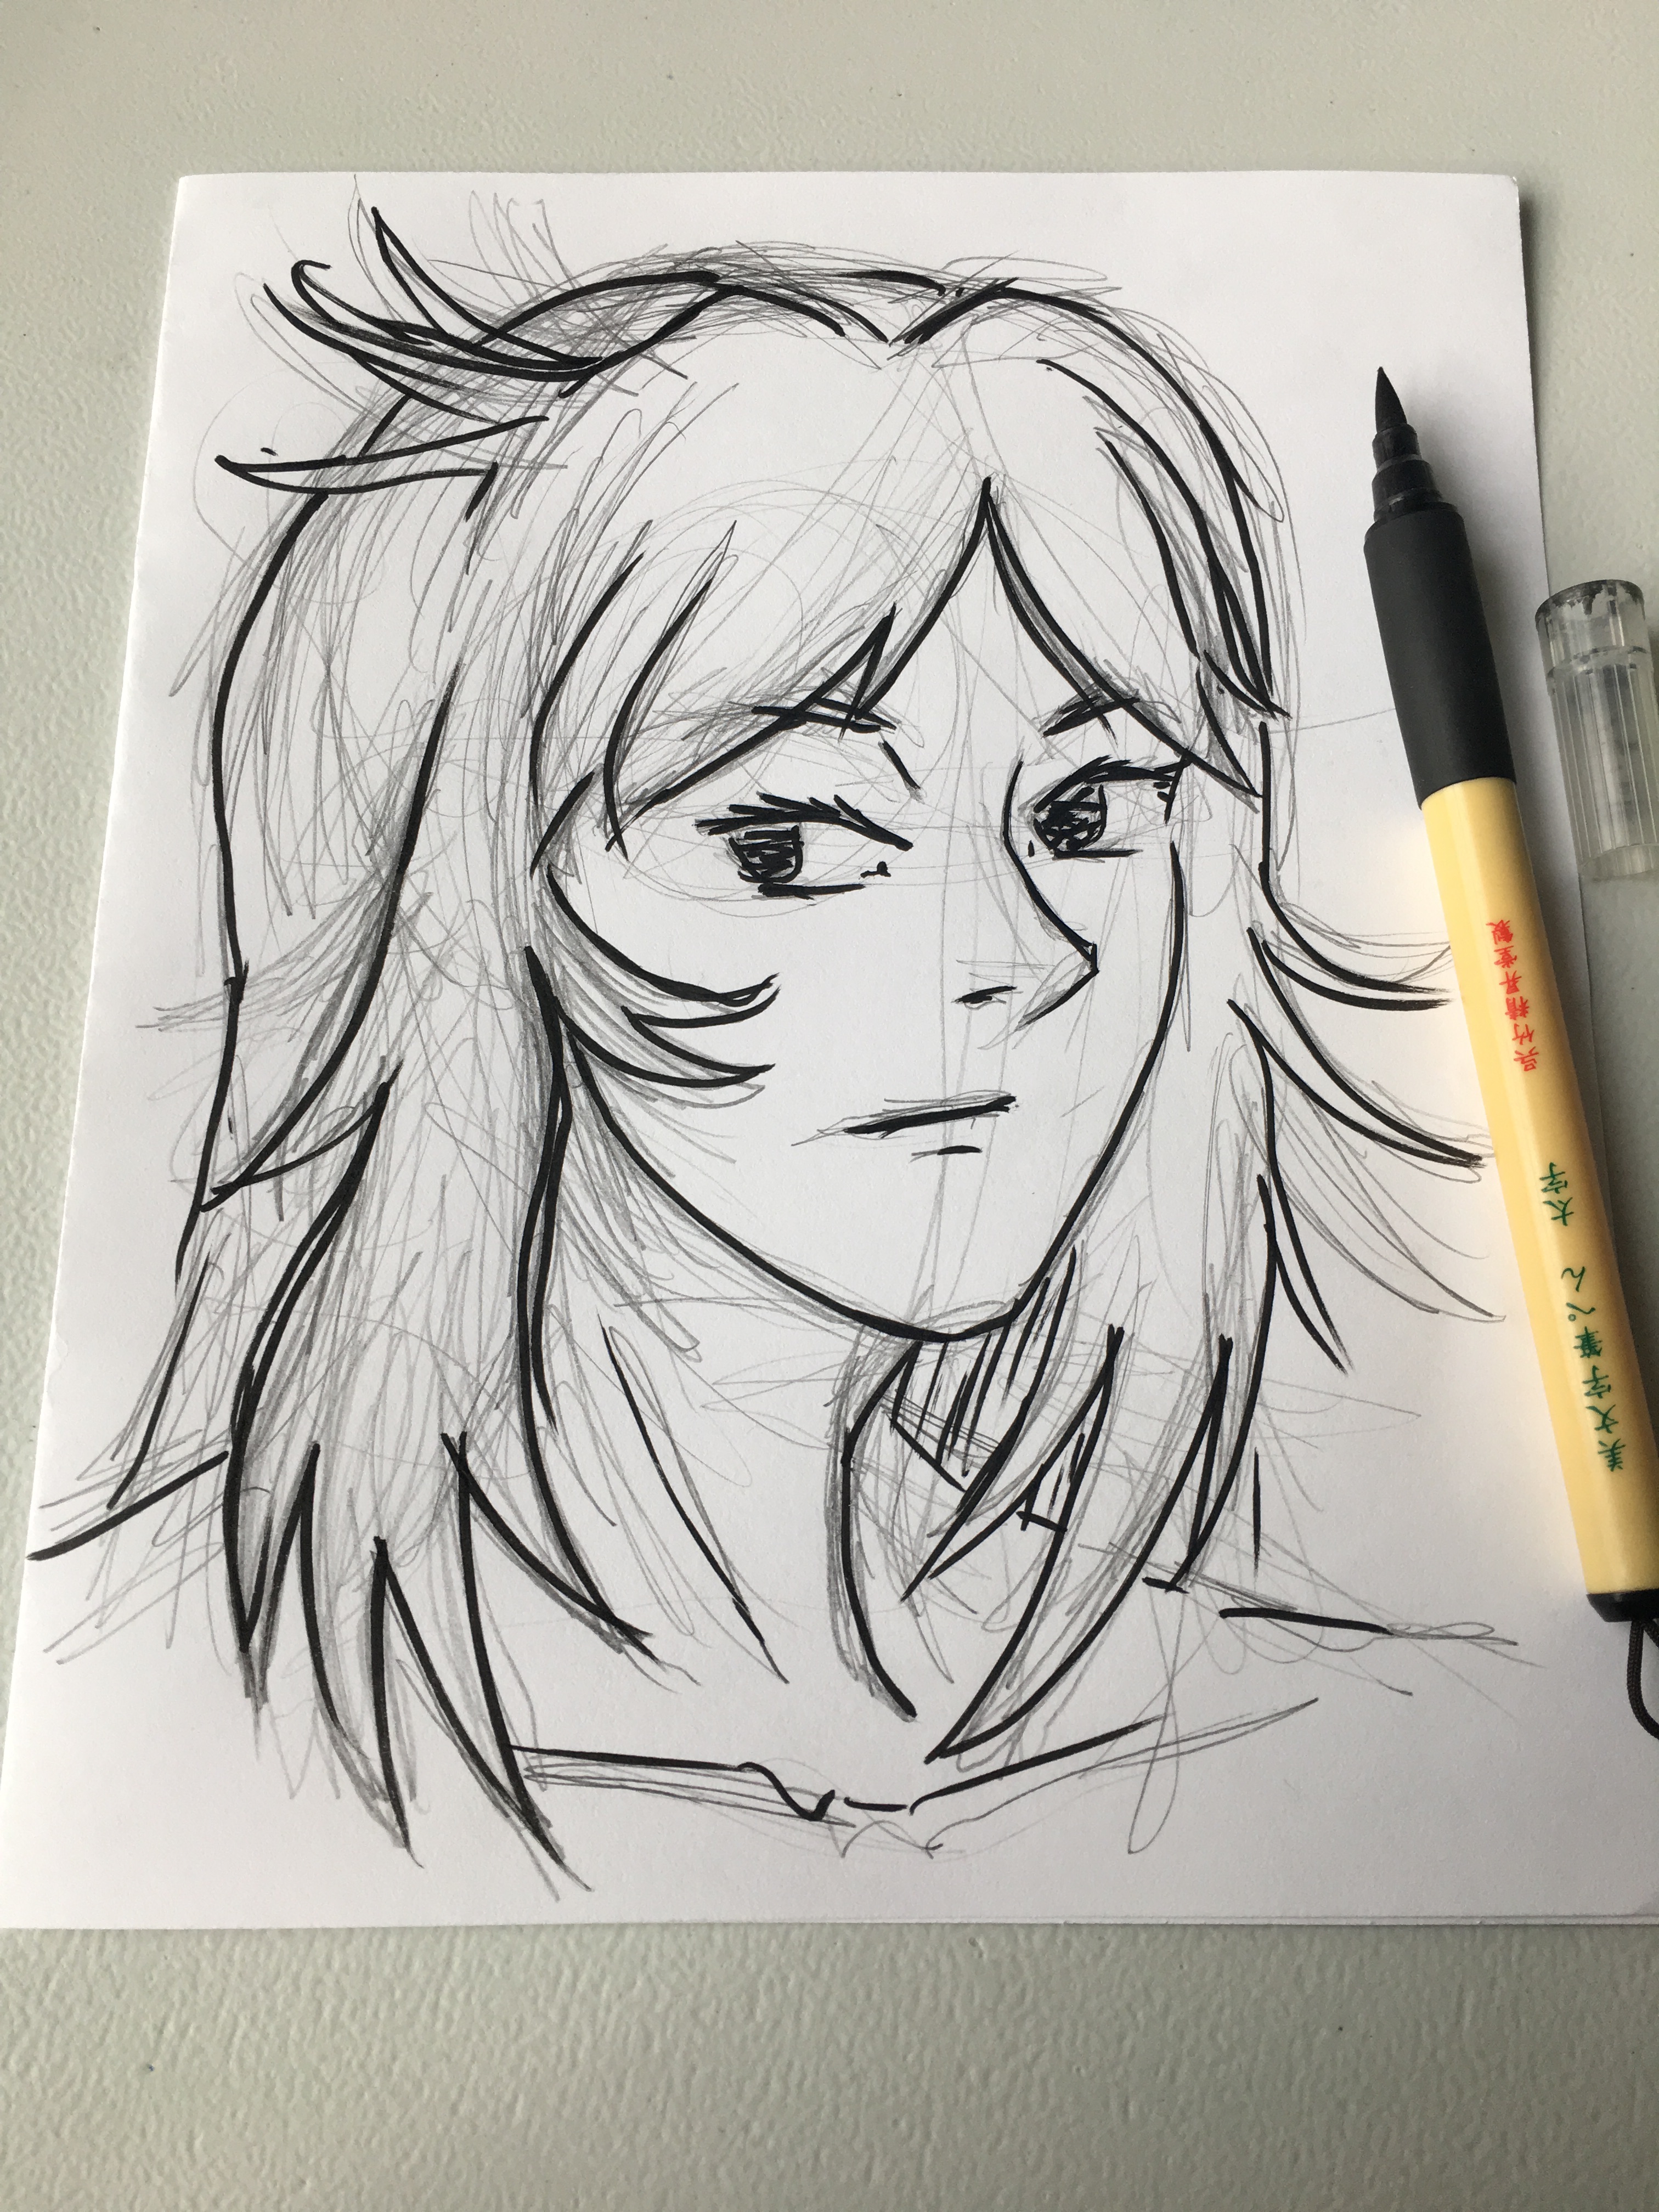
2. Refine Your Sketch
I like to go over my pencil line with a bold ink of some kind. This tapers the masterpiece down and bit and help the image really show up on the light pad. I really enjoy using these Kuretake Bimoji Brush Pens for preliminary inking and even for the final pieces that aren’t going get wet. They’re cheap, but they are super flexible!
The sketch over the sketch.
3. Final Inking
This is the fun step where you get to use all the fancy toys at once! Plug in your light pad, get a piece of fine art paper, and the ink pen of your choice.
I like to use Bristol Board for comics or manga-style inking projects. For the best results with your light pad, you should close the curtains and turn off the lights.
Don’t go strait for the ink pen. Do a light outline with a pencil first. Then you can turn the lights on and make the ink lines with confidence. Take your time because inking is the fun part where you see your finished drawing come to life.
BONUS: Clean Up Your Mistakes You’re going to make a few mistakes. Don’t freak out about the permanence of ink. Dr. Ph. Martin’s Bleedproof White is AMAZING for little touch-ups here and there.
This eye needs a little bit of white out.
Get ready to color! Scan your line work at 300dpi and get ready for digital painting! Tutorial coming soon!
Figure Sketch on Paper: Stephen Dallas (model reference from Proko on YouTube)
Before You Start Drawing Human Anatomy
This article will also help you know what to expect from drawing human anatomy. It’s ok if this is uncharted territory for you. Everyone starts somewhere.
As soon as you tell anyone you’re an artist the first thing they often ask is “Can you draw hands?”. In this article you’ll learn a plethora of practical tips, free resources, great habits for drawing the best figures ever! No matter what style or media you use, this guide should bring new life to your art.
The Importance of Foundations
If you’re self taught then maybe you’ve never heard this term; foundations. The foundations are the bedrock, basics of art. While art is a glorified intellectual talent in this century, 500 years ago artists were trade-skilled craftsmen just like welders or carpenters today. Because of this, our forefathers in art created methodical teaching methods that could train any person up to an adequate understanding of principles they needed to execute work for their employers.
So over the last half a millennium artists have fine-tuned and crafted this educational system into simple sets of rules to be understood. If you work hard at understanding the foundations, you’ll have a system that can execute anything that comes to your imagination! So now that you understand why you have to learn the foundations so that you can get to the good stuff!
Naked People
You’ve got to get over any preconceived ideas about nudity and humans undressing. You’ve got to get close to the skin if you’re going to learn how fabric drapes over the form or how the human body’s musculature changes while in action. So mentally prep yourself to get over any lingering bashfulness so you get straight to the content.
Supplies
Paper:
Learning anatomy requires a lot of drawing. So get ready to go through reams and reams of paper on this journey. The cheapest pad of copy paper is fine for drawing in earlier stages, but get a few nice large sketchbooks and 18″x24″ pads of paper for drawing more refined drawings.
If you are already fluent in Adobe Photoshop and using a Wacom then go ahead and use that for practice. But you should still invest in the larger pads of real paper for larger pieces. Also, avoid using the command z to undo strokes you make in Photoshop. Limit your tools so you are forced to live with your mistakes just like on real paper. Stick to a basic brush around 60% opacity/flow and an eraser around 60% opacity/flow. This is a great way to emulate the laying effects of charcoal.
As you become a more advanced user of digital tools feel free to break these rules. This is strictly for foundations. Introducing the infinite complexities of Photoshop would do more harm than good at this stage. The iPad Pro offers some great sketch tools even simply in the notes app!
Drawing Tools
This list will be short and sweet. Pencils, erasers, and charcoal. You many want some wetnaps if you like making a mess with charcoal.
Even a $20,000 drawing could be made with a $15 starter kit. Don’t fall for the shiny kickstarter project that has the “swiss army drawing kit” everyone needs. The more complex your tool set, the more intimidated drawing will seem at first. Having to grab your tool box and sort through dozens of utensils before starting a drawing is a chore anyway.
Added value: You might be sitting on the bus thinking “I wish I could draw that right now. If only I had my tools.” If you are used to using simple tools you’ll be able to draw anywhere!
Camera
Document your work with your phone or a digital camera and back it up online before tossing your used sketchbooks.
It is valuable to see how much you’ve grown as an artist when you need that bit of encouragement after a self deprecating drawing session gone wrong. It is kind of cool at first to see a pile of 25 sketchbooks filled to the brim with studies. But eventually you’ll need space on your shelf for something more useful than a pile of used paper.
Recycle your old sketchbooks or give them to your proud mother/grandmother when its time to make room. Learning how to let go of what is old and celebrating the journey is a great way to live in the moment is a great mindset to claim as an artist who is alway growing.
A Typical Figure Drawing Classroom Session
Gestures and Speed Drawing
There are great sites like https://line-of-action.com/ that offer tons of FREE resources for you to practice figure drawing. This particular site has a selection tool and timer so you can emulate real classroom setting. You can select male/female, nude/clothed, and how many seconds/minutes you want to spend on a pose.
Most figure drawing sessions start with a series of 60 second speed drawings. These quick studies are usually referred to as gestures. A gesture simply captures the idea of an action or emotion in a few lines and smudges.
Drawing quickly forces you to make bold decisions and to not dwell on your marks too long. If you want to learn how to eliminate artists block this is a great way to teach your mind to just do it. If you spend too much time dwelling on lines to make, you’ll never be able to rack up the number of practice pieces you need in order to actually grow.
Beyond the Gesture
After the 60 second drawings you will usually have several 2, 5, 10, and 15 minute drawings. The 10 and 15 minute drawings are where you usually have enough time to get some real anatomy laid out on your study. During this portion of your figure drawing session you are effectively practicing how to start a drawing.
Think of these drawings as the blueprints for potential finished pieces. How many finished art pieces do you have to create before you can start seeing a change in the quality of work you produce? How about 300? A typical finished piece might take anywhere from 6 to 12 hours. The math for that looks like 300 pieces times 9(average number of hours) equals a whopping 2700 hours. Of course many professional artists spend 100s of hours on their masterpieces, but you have to get a lot of experience under your belt before you get to that point.
So by effectively practicing these 10-15 minute drawings you’ll learn how to be more selective about what drawings deserve to be fully executed in the next phase. But I’d also argue that most of the time you’ll find a 15 minute drawing means more to you than a 10 hour drawing.
Take a Drawing to Warp-Speed
Even if you aren’t a professional figure artist, it is important to practice taking your drawings to their fullest potential. Much like physical exercise, you have to break previous limitations to find yourself in the best shape of your life. This means spending 3+ hours on a piece even if its just practice.
As you get better and more confident you’ll find yourself looking at a 20 minute drawing and thinking, “wow that’s great. I’ll settle for this.” Having a mental checklist of what it takes to make a good piece is great for 80% of your work, but the other 20% should be spent on the bleeding edge of your limits.
By living on that bleeding edge you’ll find that your process gets more advanced and easier to produce. Soon you’ll see that a drawing that might have taken 2 hours is now accomplished in 20 minutes thanks to constant refinement.
The Pain Means its Working
Be warned that the bleeding edge is painful. It is natural for you to feel overwhelmed when you’re in uncharted territory.
Ok, there’s not a lot of actual pain in this step, but think back to the example in physical exercise. You’ll find yourself thinking that it is done already and its an A+ but that is only the halfway point. This is where your second wind as an artist should kick in.
Get messy. Wipe the flat edge of your charcoal through the entire sheet. Scribble some crazy stuff in the middle of the page. Erase half of the drawing. What this does is creates visual problems for you to solve from outside your usual checklist of how to make a good piece. This should keep you from getting into a rut. Apply these techniques if you ever find yourself in the midst of artists’ block. It’ the equivalent of cold showers for artists.
Putting in the Time
A typical figure drawing session is 2-3 hours in a classroom. The online resource mentioned previously lets you emulate that experience free of cost so there’s no excuse not to start now!
If you can have these sessions 2 or 3 times a week, you’ll have a great future ahead of you. Many pros only do this once or twice a month just to keep their skills sharp, but in your formative years of learning good habits and techniques a more strict routine is recommended for a few years at least. Soon these techniques will be second nature and you’ll know it was all worth it.
Your Study Guide Outline
Here is an example of an itinerary you can live by while you’re improving your figures.
Tip for the pros:Maybe you have a lot of experience and don’t think you need to spend a whole year diving back into anatomy. But every artist could benefit from 1 month of visiting foundations at least once a year. I’d challenge your to do that.
Keep in mind that these are planned to be executed on weekdays only. You should rest on the weekends if you can manage it!
DAY 1-10: Warm up with 50, thirty second gestures. Draw 5, two minute drawings. Draw 1, ten minute drawing. Look at your drawings and identify a single weakness(even if you see many) and draw 30 of those parts. (i.e. draw 30 hands) Total time elapsed: 1 hr 15 minutes.
DAY 11-20: Warm up with 50, thirty second gestures. Draw 5, two minute drawings. Draw 1, ten minute drawing. Keep this figure reference for the next step. Get a large piece of paper. At least 18″x24″. Restart the ten minute drawing on large paper and spend at least one hour diving in.
More Tutorials to Come
Look forward to more specific tutorials on human anatomy and immersing them in color and perspective. But keep in mind that there are no secrets or shortcuts that can compensate for real experience drawing. Please take the time to make the deep dive on your own without the pressure of a teacher looming over your shoulders. If you do get the chance to learn in a real figure drawing classroom, you’ll be ahead of the curve. Being able to understand your teacher’s vocabulary is a sure way to advance your success in the classroom and beyond.
In this article you’ll learn 5 positive ways to increase the quality and volume of your art work regardless of your experience or skill level as an artist. You will learn how to get your head in the game and keep moving forward.
1. Get Pumped
Making a piece of art is like doing a workout. You’ve got to warm up first. Half the battle is just getting your pen on the paper.
A typical routine might have you starting a familiar playlist on Spotify, putting on a pot of coffee, making some eggs, doing the dishes, feeding your cat, and making your bed – all before setting foot in your creative space. Overtime your mind will associate these tasks with creative juices to follow.
Athletes warm up and stretch their muscles before performing. Think of your brain as a muscle. Your brain actually consumes 60% of the energy your body needs to survive! Even Michael Phelps’ lats don’t us as much energy as his brain. So even more-so than muscles, you should warm up your brain for creative tasks.
When you end your routine you should have a de-stressing ritual to cool you off. This might be the perfect time to blow off some steam at the gym or to read a story to your kids. These sorts of cool down activities signal to your brain that it is allowed to rest and recover for the next day ahead.
2. Disconnect From Tech
The evidence is overwhelming that technology, while helpful, is deadly to your ability to stay on task. It may not seem like a big deal to intermittently check buzzes and dings that come from your phone and the desktop of your computer, but it adds up. Not to mention the rabbit holes that platforms like YouTube get you trapped in. These platforms are designed by the worlds’ top behavioral scientists to keep us enticed for as long as possible.
So put your phone in your bag or in the next room. If you’re working on a computer, just turn the WiFi off so you can mitigate that risk.
*Bonus Tip: Classical music or lofi hip hop might be the most distraction free music you can have playing while you make art. Its easy to get distracted by lyrics or grooves when your favorite jam comes on the radio.
3. Disconnect from your Head
Disconnecting from tech is pretty self explanatory. But why would you want to distance yourself from… yourself?
Think about all the things you have to do before next Wednesday; think about all the things you have to do before your roommate gets home. Watch out for these emotional distractions. Don’t let yourself think about that dinner date or about how mad you are that your roommate ate those leftovers. How annoying is it to have these thoughts spinning around your head? These distractions are just as bad as the buzzing of your smart phone.
A common thing many people passively worry about are household chores. Even though this isn’t purely an emotional stress, its a physical factor that correlates to stress later on. Taking the time to clear the clutter is another small way to cut down emotional distractions. So even if you work a full-time job while arting in the evenings, don’t go straight into it.
Working on art takes a lot of time and energy that should be rewarded with a worry-free “plop” into bed. There’s nothing more satisfying than laying down at the end of a hard day and knowing that (almost) everything is in order.
4. Have a Plan Before You Start
Planning as you go will ultimately slow you down. Especially if you have limited time to begin with. The life coach and best selling author Steve Chandler said one hour of planning saves three hours of execution.
This step actually starts the night before. Sometime before you go to bed, write down a few goals for your next creative session and how you’ll do it. Decide what references you need to collect, what supplies should be set out, and how much technology will be involved with every project before you even begin. This is all about visualizing yourself completing what you set out to accomplish.
How often do you set out to accomplish something and fall short of the final goal? Setting up small plans and completing what you set out to do will build your capacity for confidence. More confidence will turn into you reaching higher than you previously thought you were capable of.
5. Plan on Things Not Going According to Plan
You never know what discoveries will reveal themselves while you’re working. Artists aren’t robots pumping out piece after piece, they innovate and push themselves to the next big thing. So if you find yourself in the midst of a great discovery, just go with it!
But sometimes the hiccup you encounter isn’t actually a great discovery. It hinders your process and this can be very emotionally draining. Here’s a short exercise that can help keep you on track when the unexpected happens…
Keep a pad of paper nearby where you imagine all the things that could go wrong while you’re working. Maybe you struggle with drawing hands. In your note book write down “get bogged down in details of the hand” as your potential road block. Then take a moment, scratch your chin, say “ah-ha”, and write your solution – print reference hands and draw desired pose 8 times on scratch paper beforehand (no pun intended).
These micro plans are a great way to keep those negative-stress hormones at bay whenever you run into trouble. As you get used to tackling problems in this manner, you’ll see yourself as an artist who overcomes things rather than relying on whatever skills are already under your belt.
Think about it like this… Do you see yourself as a visual dictionary with a pencil attached to it? Or do you see yourself as a visual explorer who is ready for whatever is around the corner? If you master adaptability, you’re setting yourself up to master anything.
In Conclusion
The 5 suggestions to improve to productivity as an artist are as follows: Get Pumped, Disconnect from Tech, Disconnect from your head, Plan Ahead, and to Plan on Things not Going According to Plan.
No pain. No gain. Like many before you, you’ve had romantic thoughts of what it would be like to be a successful artist in the modern world. But you shouldn’t be discouraged when you put your pen to the paper and things aren’t going as smoothly as you hoped. Like any technical skill, there is a steep learning curve with art and sometimes its painful.
But the pain means it is working!
If this post helped you get through the day or planted a seed in your headspace, consider sharing or subscribing. Weekly artist tutorials and tips coming every week!