
Making clean line art can be frustrating, but it is really easy if you follow this simple 3-step tutorial. If you haven’t been using the technique show below, you’ll see an improvement almost overnight!

Before You Start: Tools for Great Line Art
Building your tool chest is important, but don’t fret if you don’t have these exact tools. The process is more important than specific tools in the end, but these basics are easy to cover!
1. Pencils of all Shapes and Sizes

The favorite sketching pencil of manga artists all over the world is a simple BIC brand mechanical pencil. Its simple design has stood the test of time for decades on end. The box featured in this link is only about $7 for 40 pencils with lead. I’ve been going through the same box for over a year and I think it’ll last me at least two more years. The other pencils photographed are awesome as well, but I’ll write more about fine quality Tombow MONO pencil and Staedtler’s mechanical clutch pencil on a later date.

2. Inking Pens and Brushes
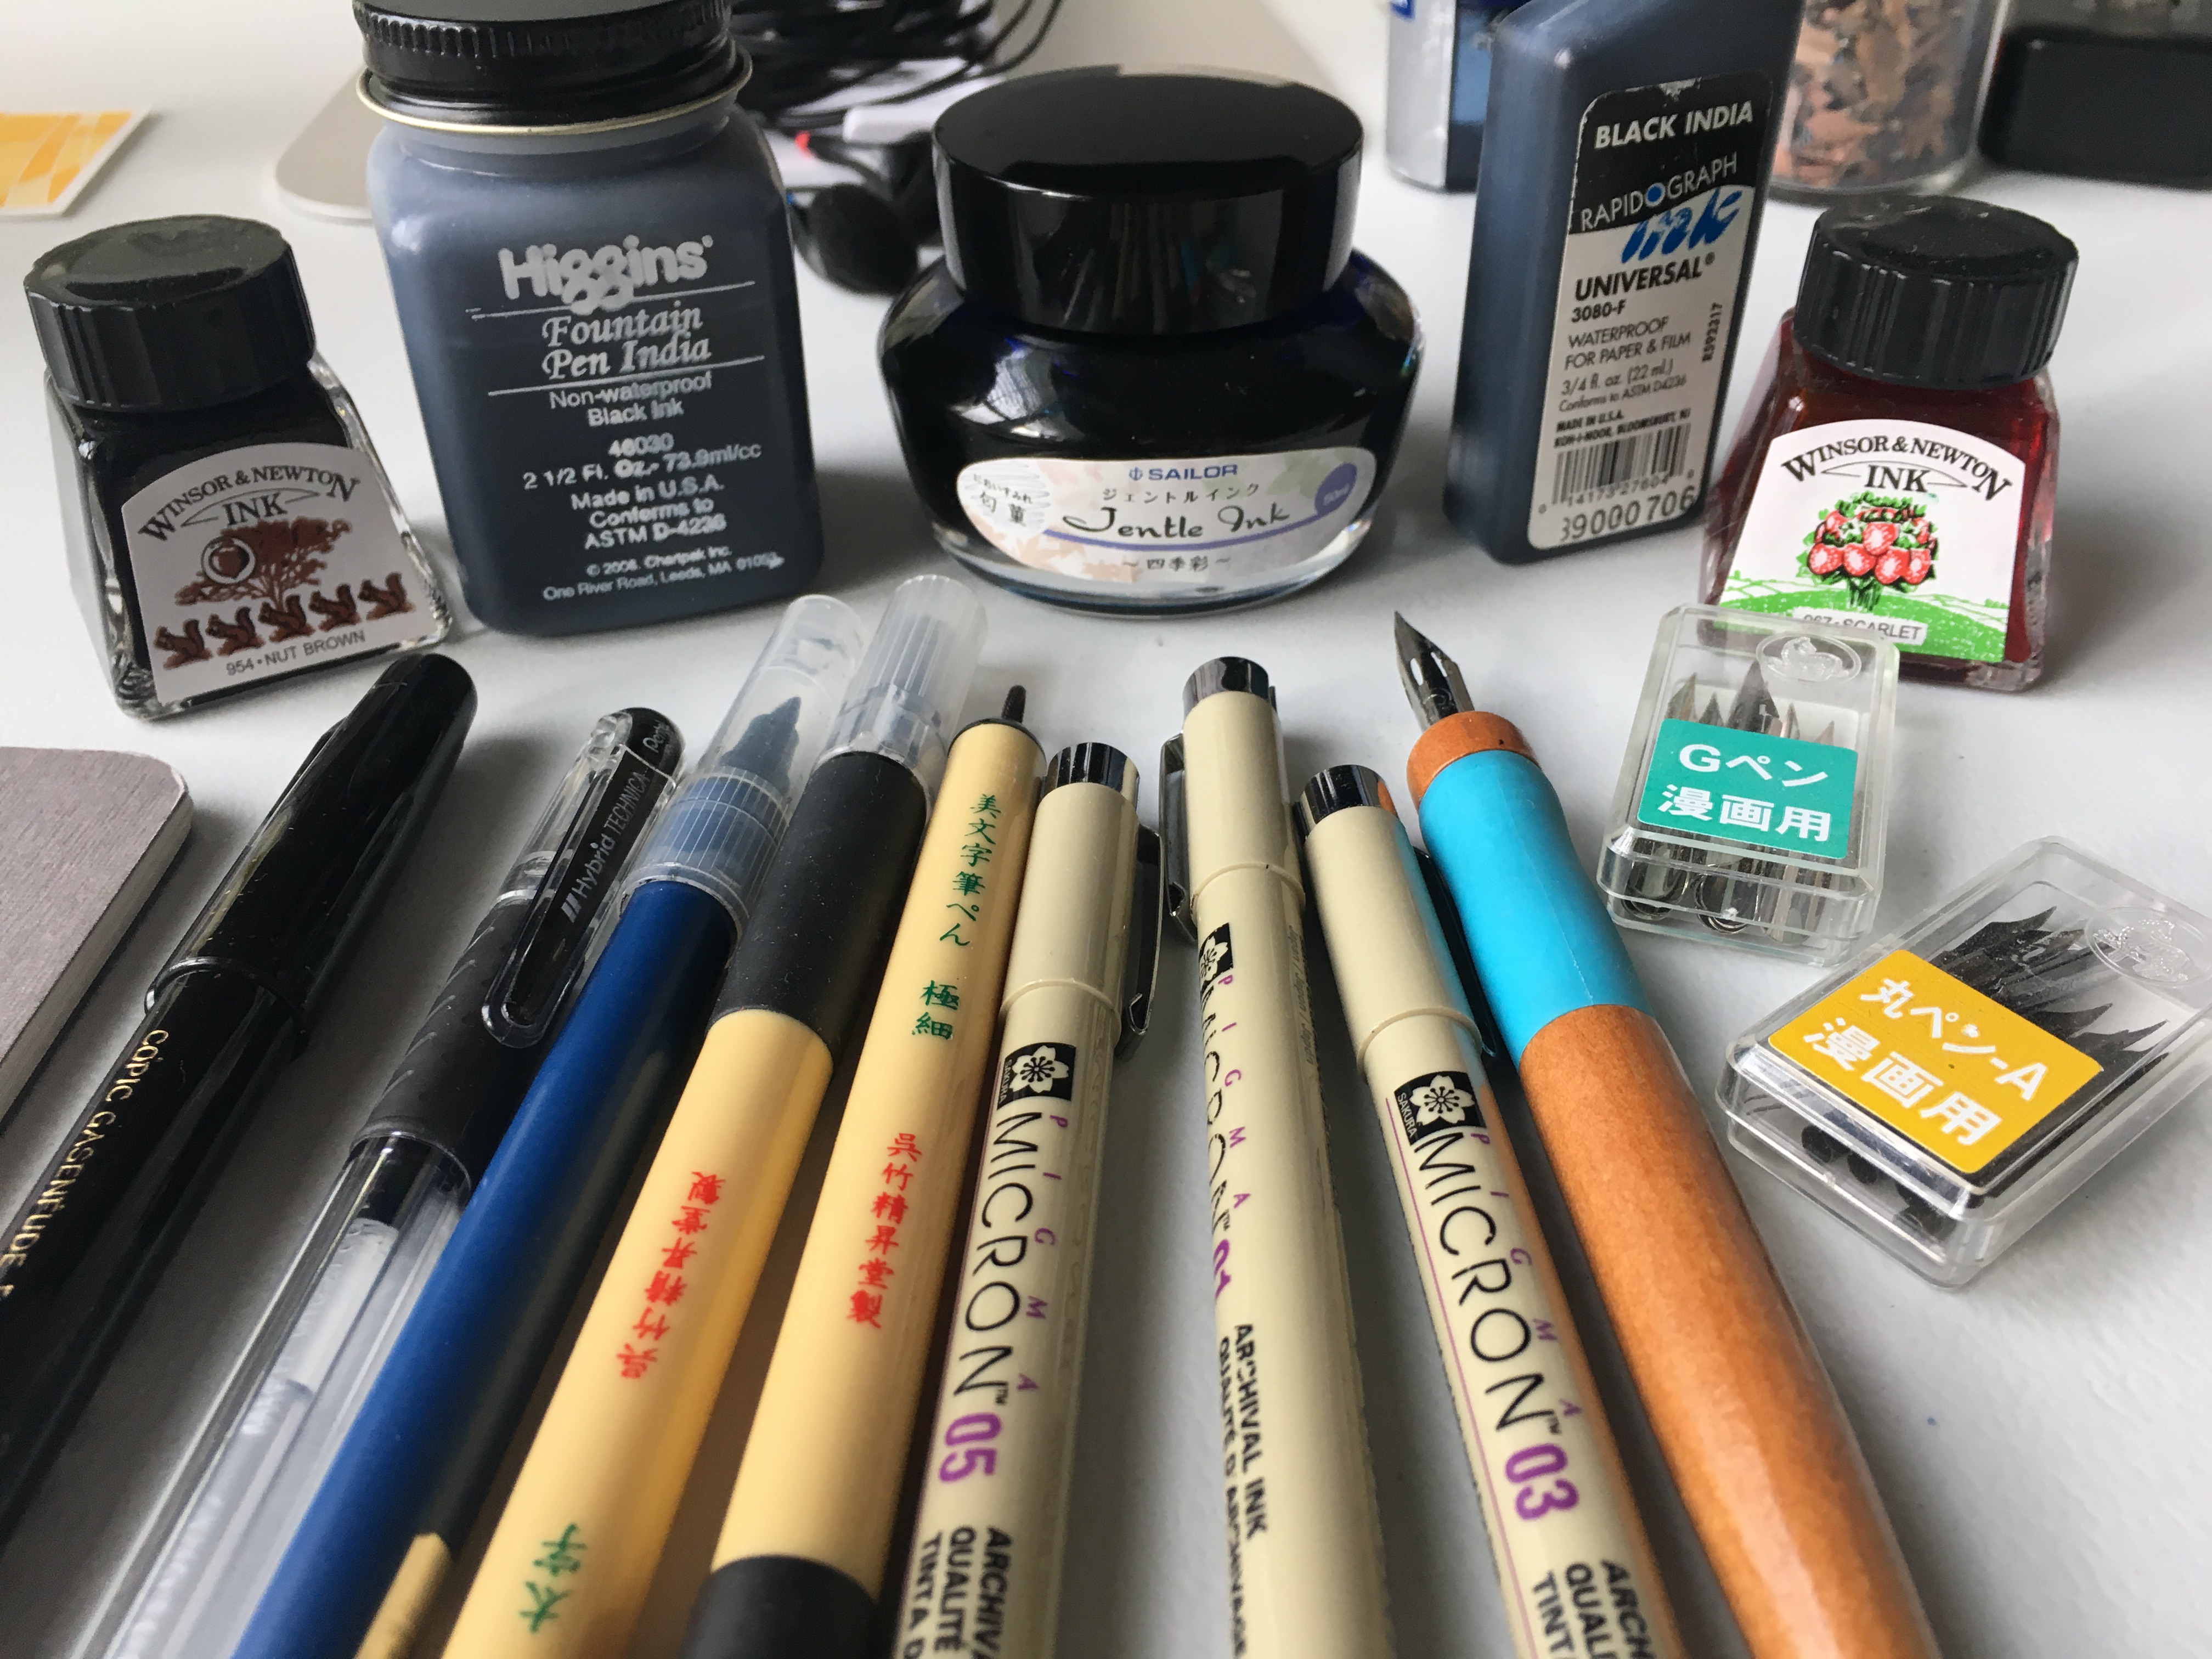
You’ll see I have MANY different types of inking devices to choose from. I usually recommend beginners start with Microns. But the more advanced your technique becomes the more variety of ink pens you might choose from. The variety of pens and the marks they all can make are a subject for another day.
My personal favorite inking device is the Tachikawa Comic Pen Nib Holder and many of these interchangeable nibs.
3. Light Pad
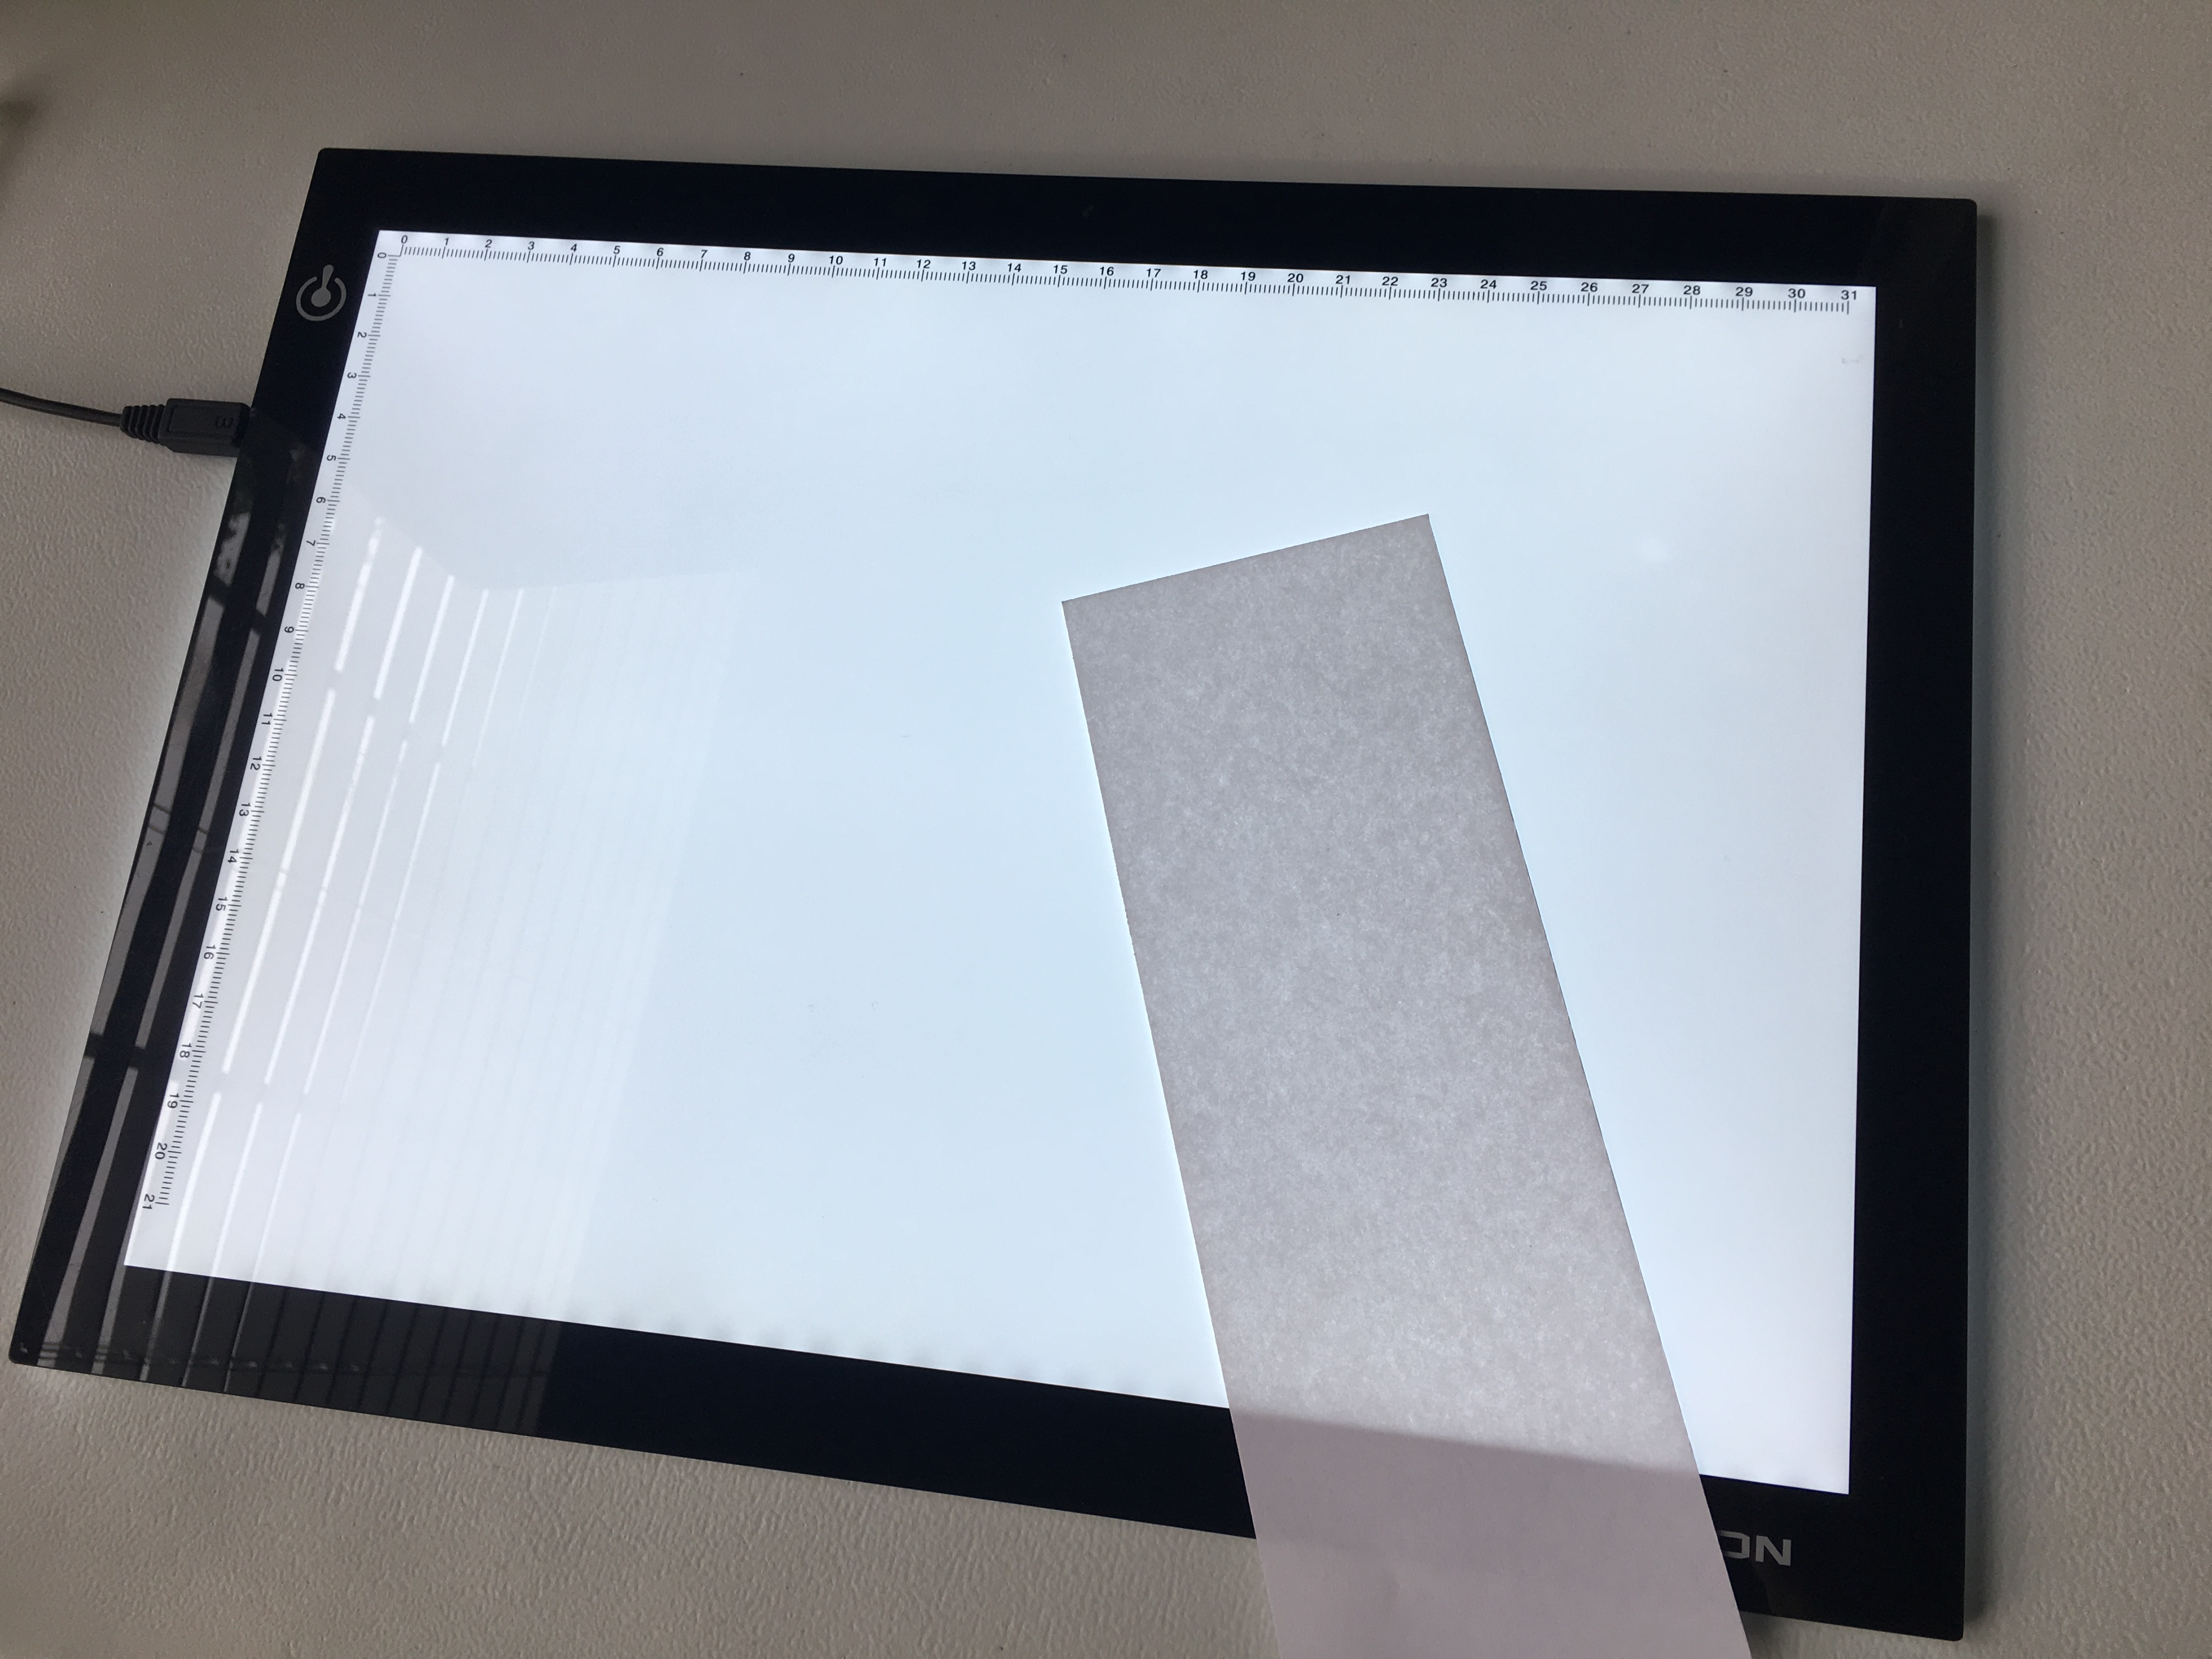
A light pad of some shape or size is 100% necessary for this tutorial. But you can also tape paper to an open window or a glass table with a lamp underneath it. I recommend the HUION brand if you want an affordable light pad that comes in many different sizes.
4. Copy Paper

Copy paper is the timeless constant for sketching your ideas. I recommend copy paper because it is usually cheaper than sketchbooks per page. This box of copy paper is less than $20 for 1500 sheets which costs less than 1 cent a page. While this cheap sketchbook has only 100 pages for around $7 which is about 14 cents a page! I love carrying a sketchbook, but I like drawing more finished artworks in nice sketchbooks like these premium Moleskine sketchbooks. These are great sketchbooks, but reserve them for finished pieces. Copy paper is the king of rough sketching!!!
3-Step Inking Process
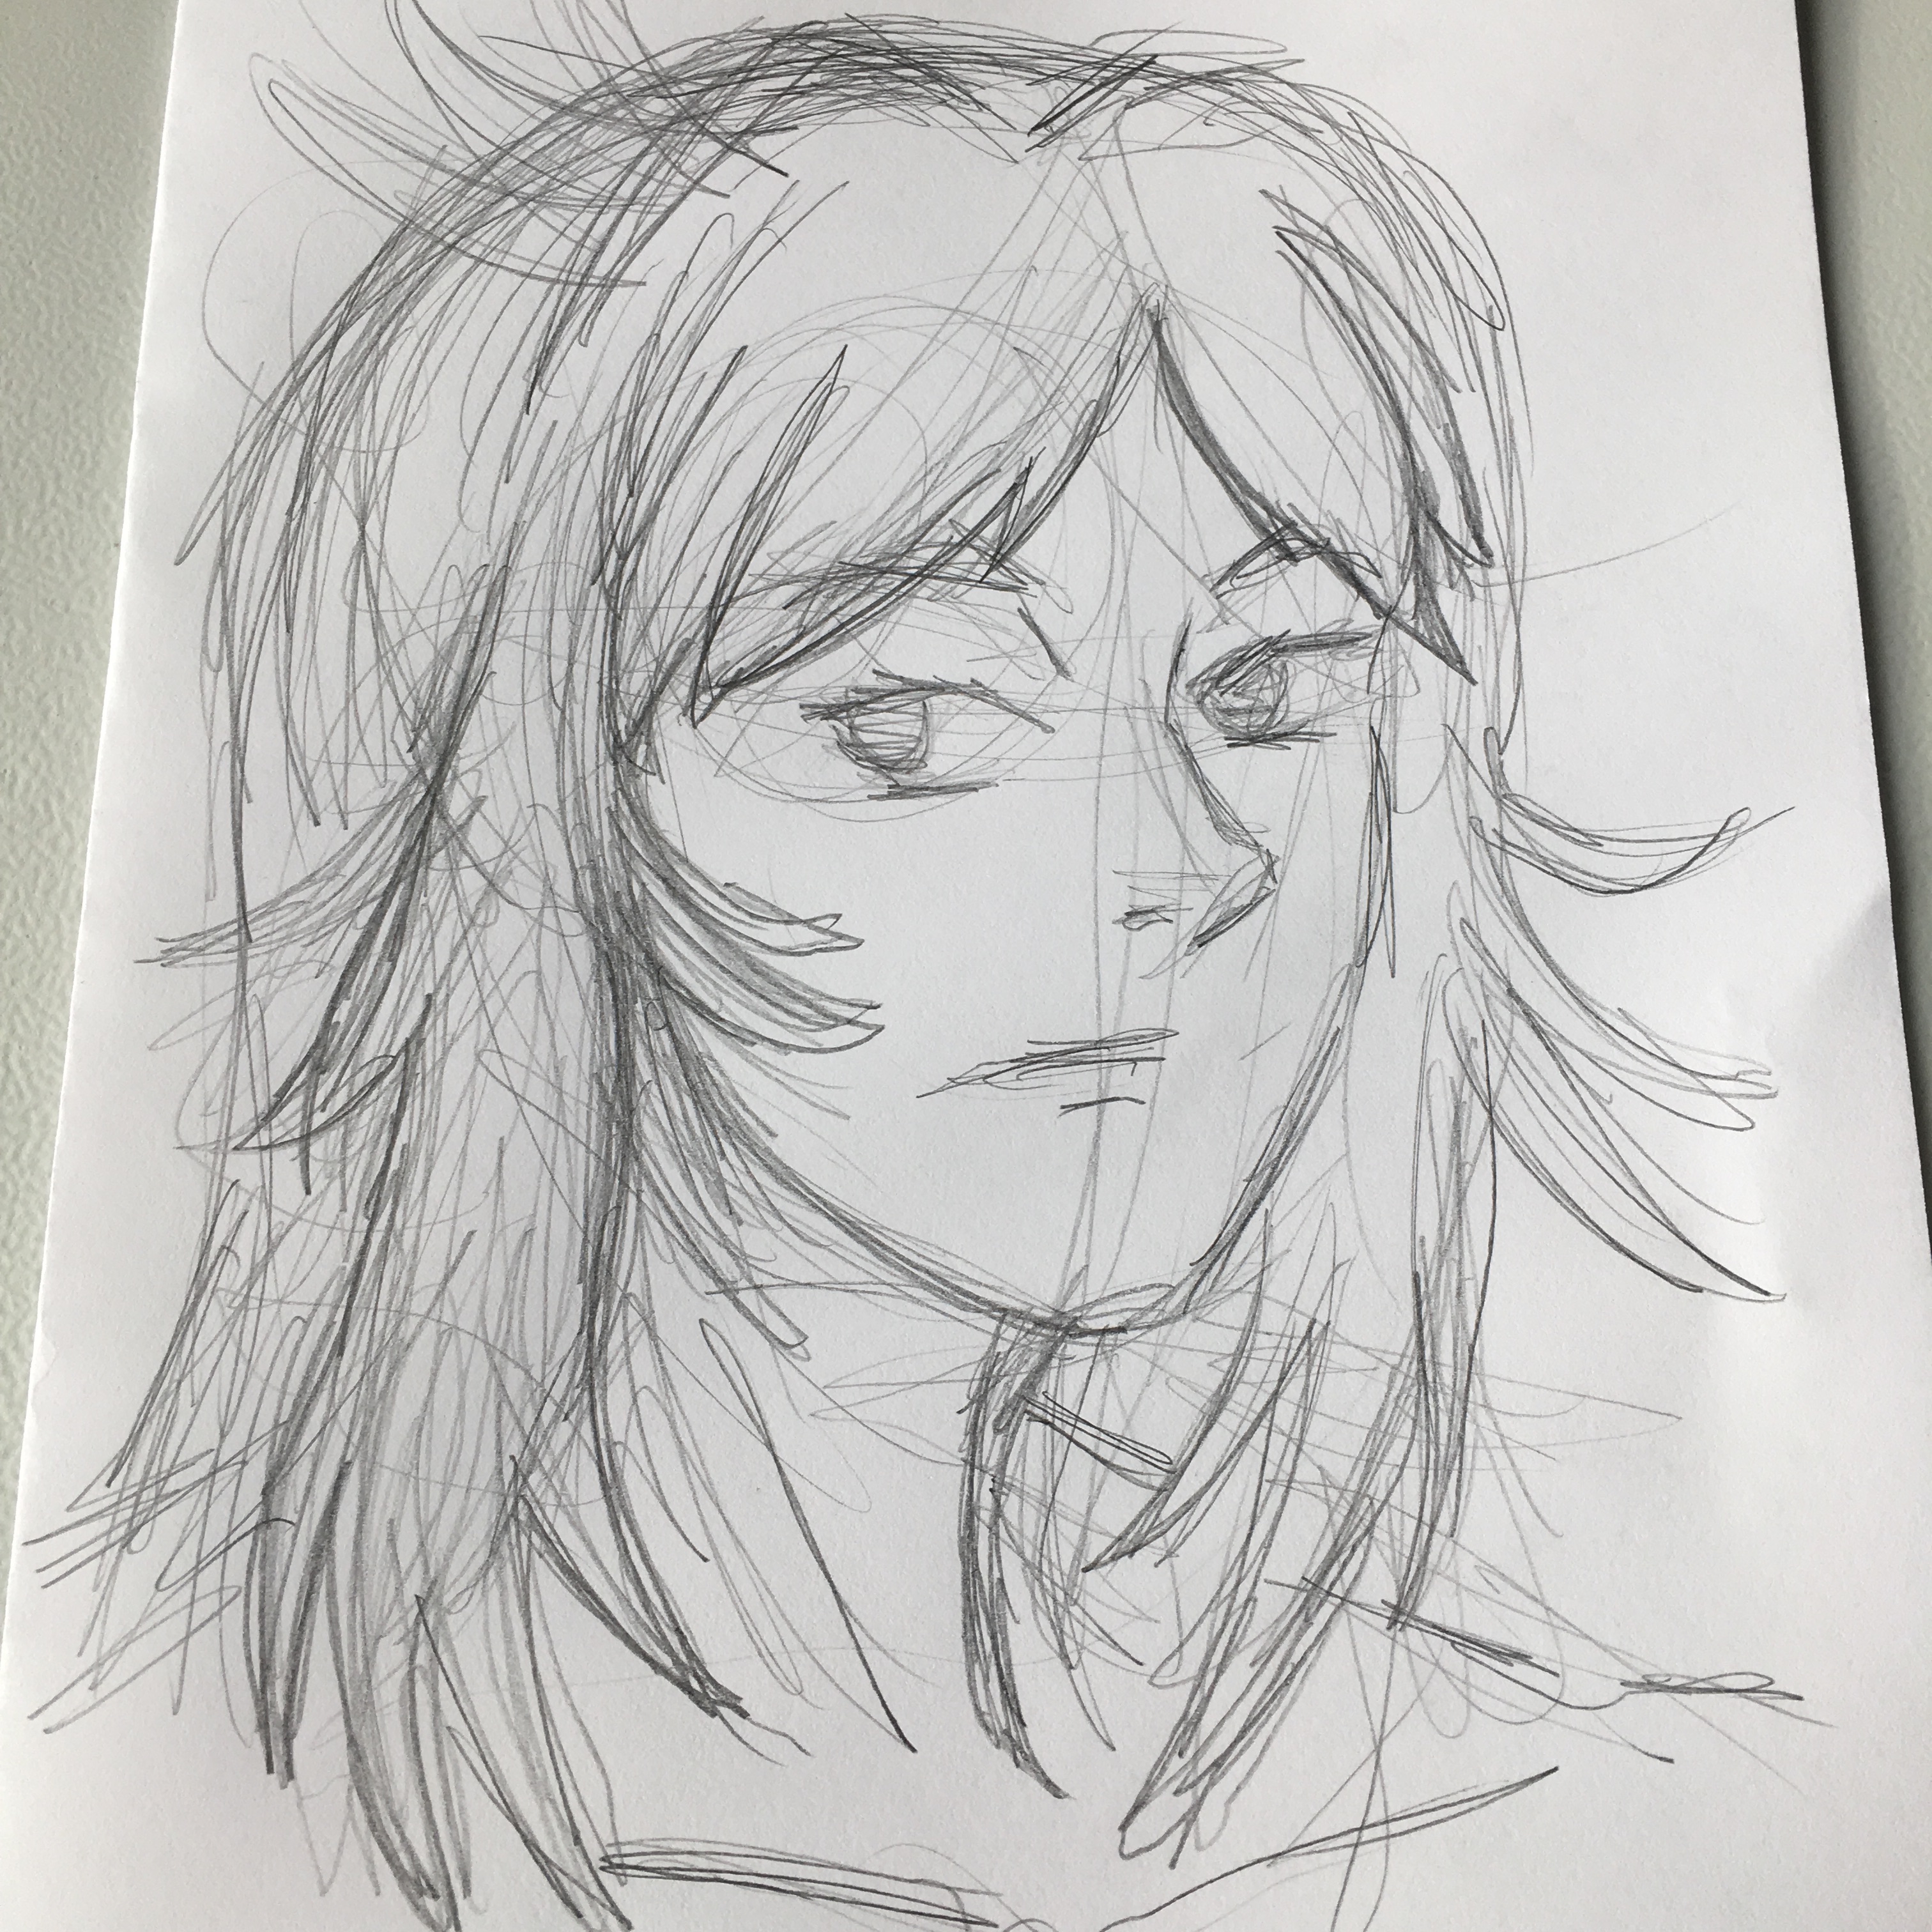
1. Start With a Rough Sketch
Grab your copy paper and get messy. No lines are sacred. This hazy sketch is like the marble you will carve your drawing out of. But this IS NOT the piece of paper your final art will be on. Many new artists waste hours of time erasing lines and choosing which lines are most vital to their drawing. You shouldn’t try to draw it perfectly the first time. Be bold now because you know you’re going to do it perfectly on the last round!
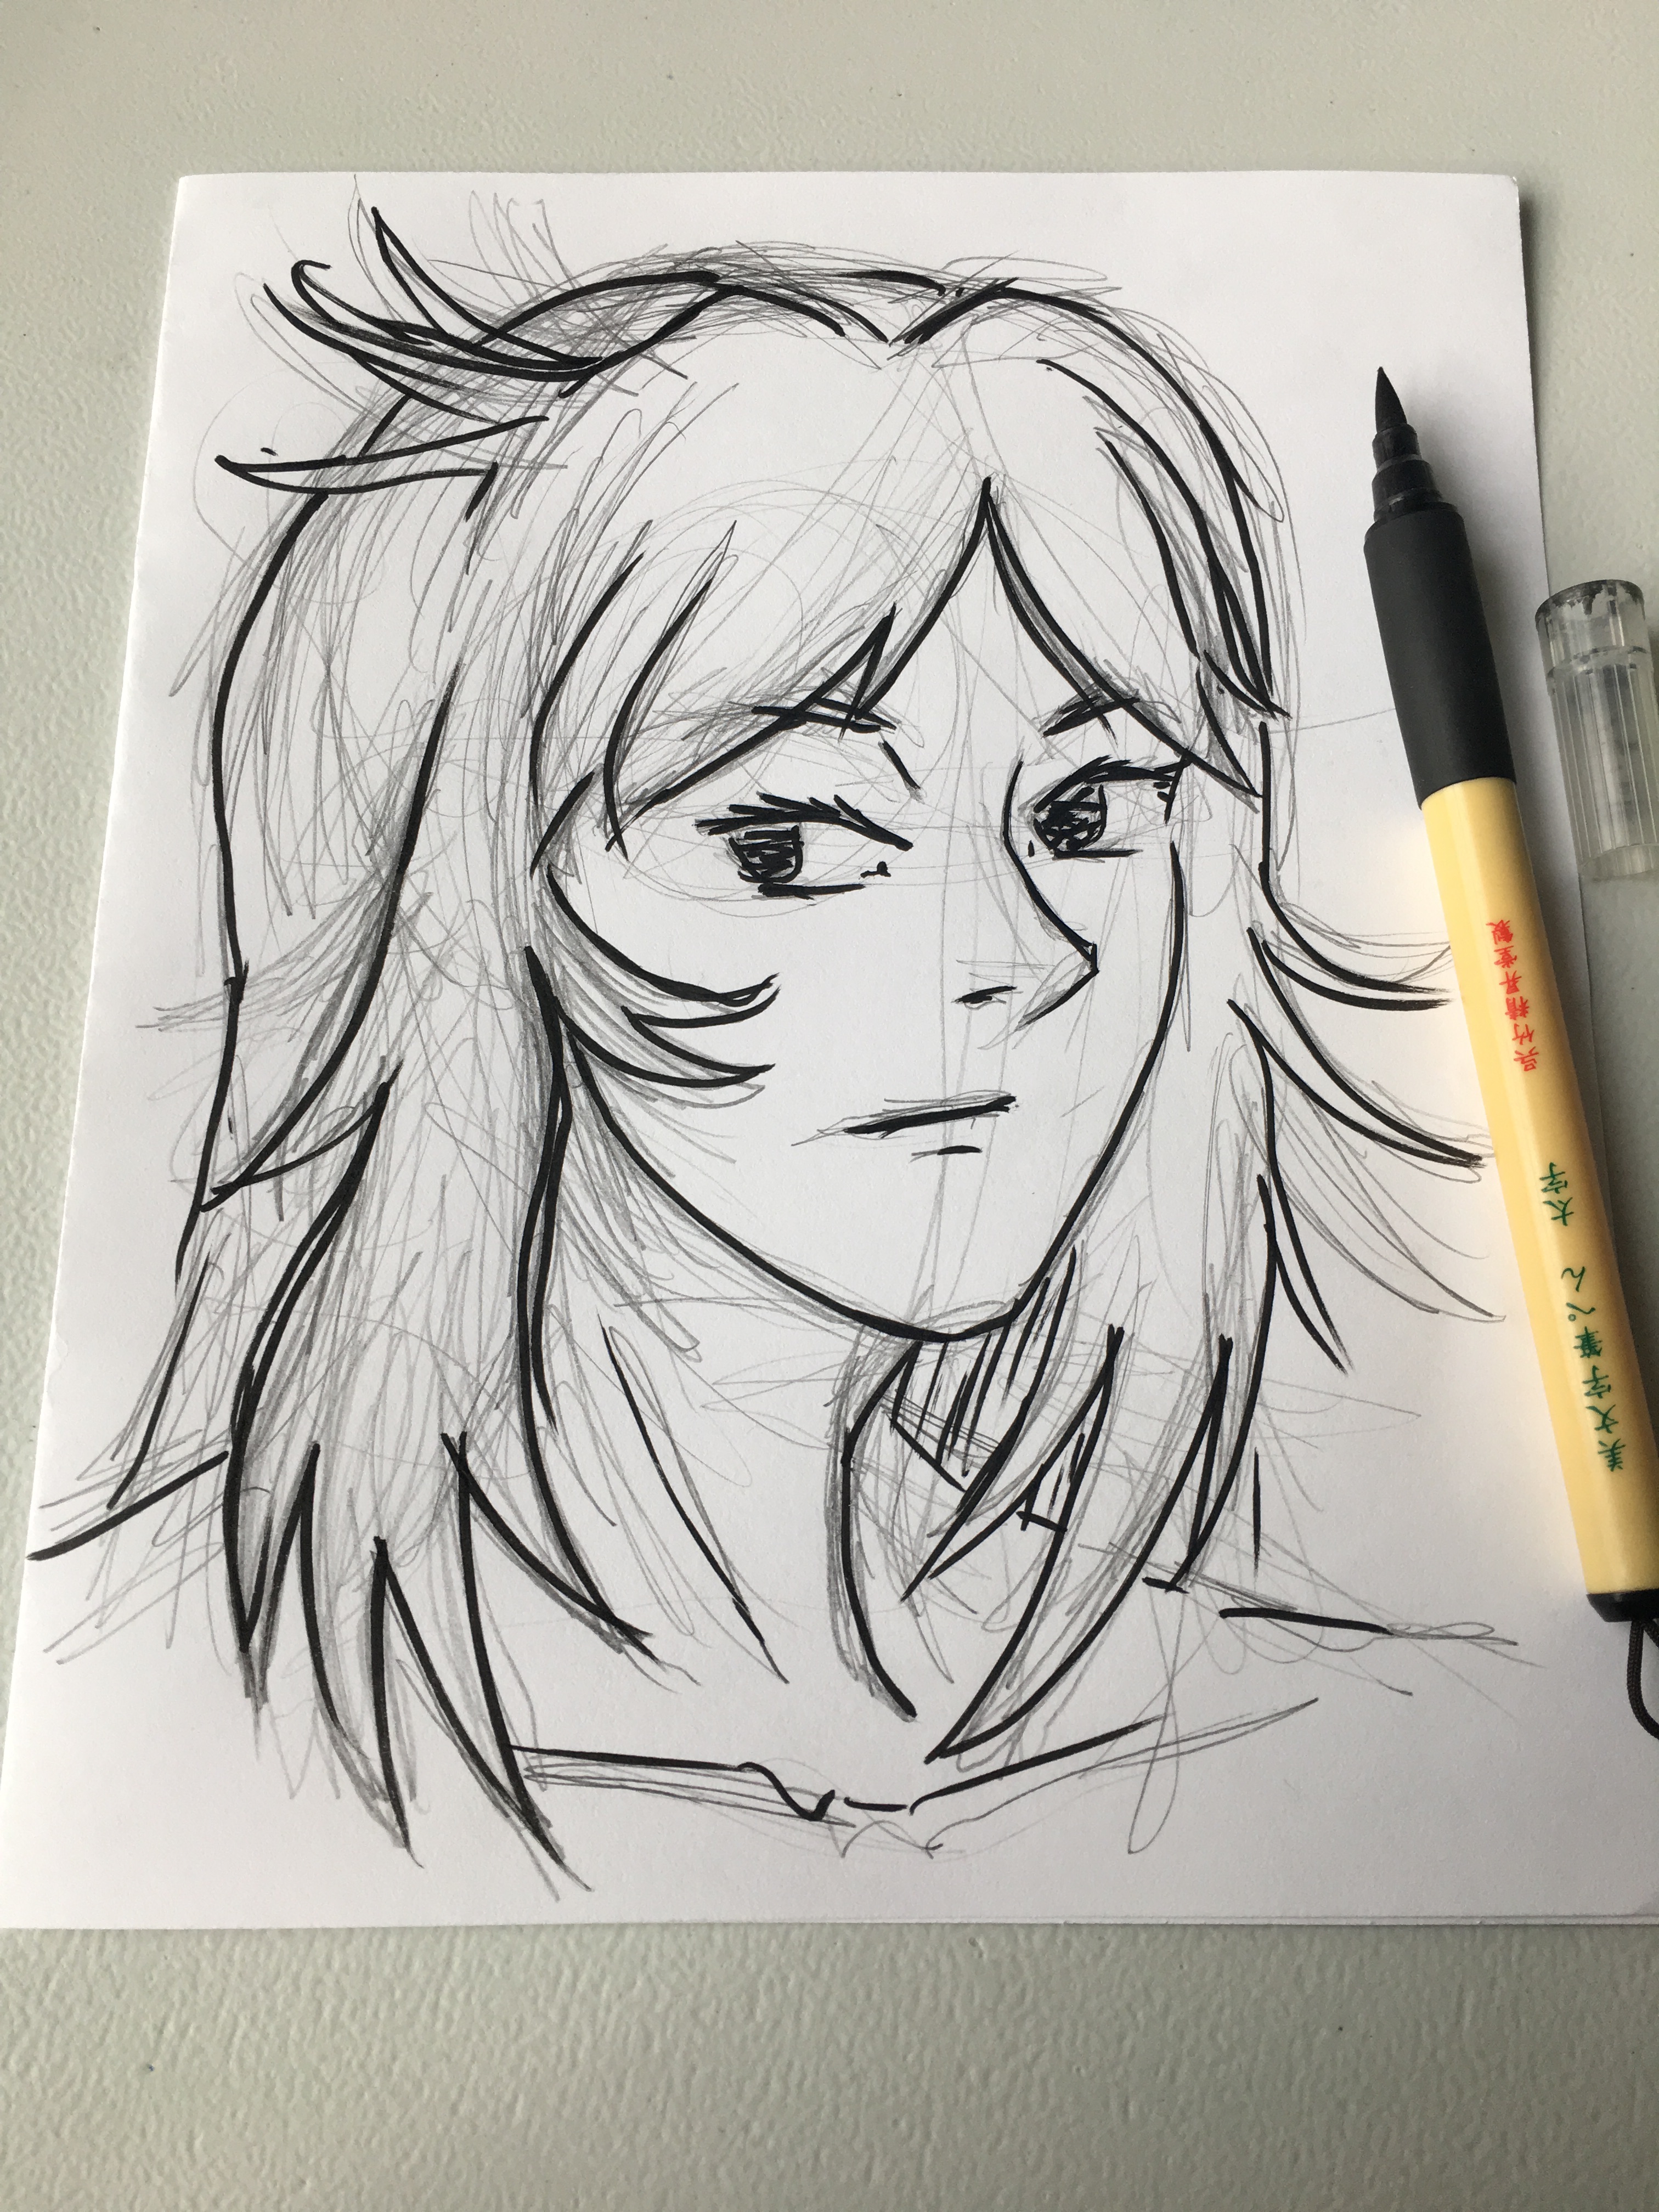
2. Refine Your Sketch
I like to go over my pencil line with a bold ink of some kind. This tapers the masterpiece down and bit and help the image really show up on the light pad. I really enjoy using these Kuretake Bimoji Brush Pens for preliminary inking and even for the final pieces that aren’t going get wet. They’re cheap, but they are super flexible!
3. Final Inking
This is the fun step where you get to use all the fancy toys at once! Plug in your light pad, get a piece of fine art paper, and the ink pen of your choice.


I like to use Bristol Board for comics or manga-style inking projects. For the best results with your light pad, you should close the curtains and turn off the lights.
Don’t go strait for the ink pen. Do a light outline with a pencil first. Then you can turn the lights on and make the ink lines with confidence. Take your time because inking is the fun part where you see your finished drawing come to life.

BONUS: Clean Up Your Mistakes
You’re going to make a few mistakes. Don’t freak out about the permanence of ink. Dr. Ph. Martin’s Bleedproof White is AMAZING for little touch-ups here and there.

Get ready to color!
Scan your line work at 300dpi and get ready for digital painting! Tutorial coming soon!

One thought on “Line Art Tutorial – 3 Steps to Cleaner Lines”
Comments are closed.